⭐ Merited by ABCbits (1)
Dogie's Miner Setup Guides:
Nicely formatted version available at dogiecoin.com!


Contents:
0a) What to Expect
0b) What You Need
1) Powering
2) Cooling
3) Case
4) Configuration
5) Troubleshooting
6) Where to buy
0a) What to Expect (top)
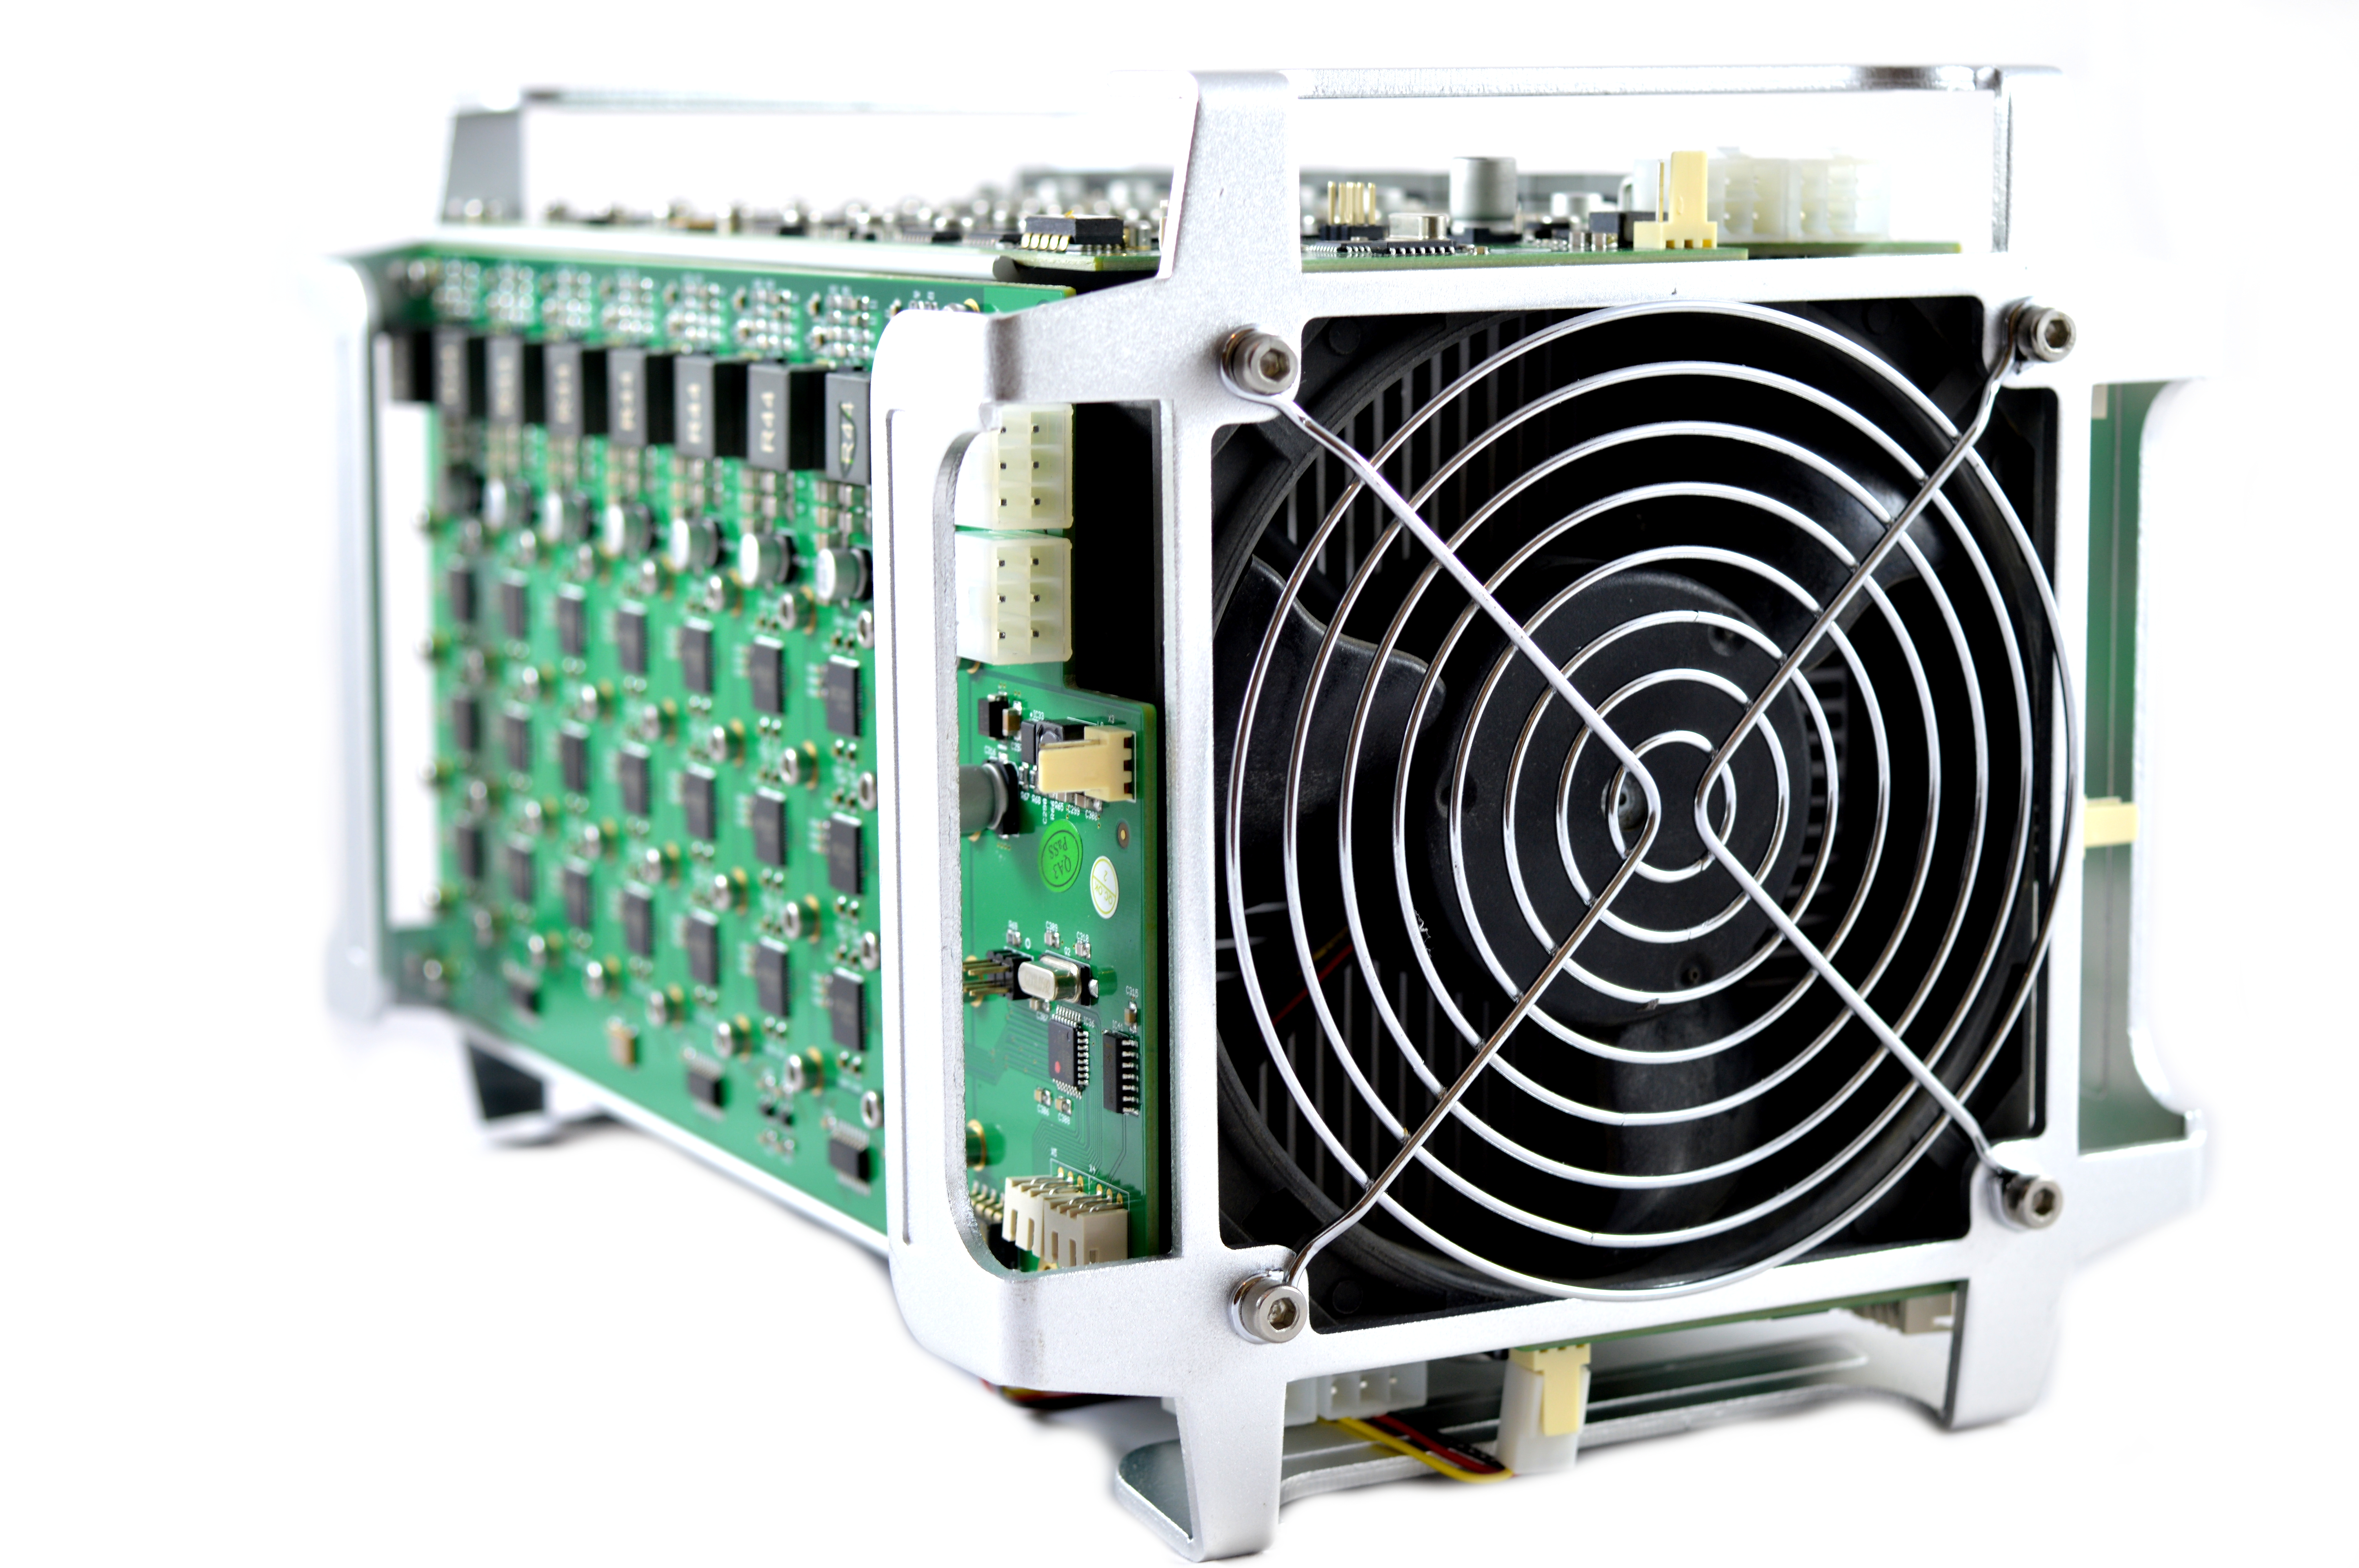
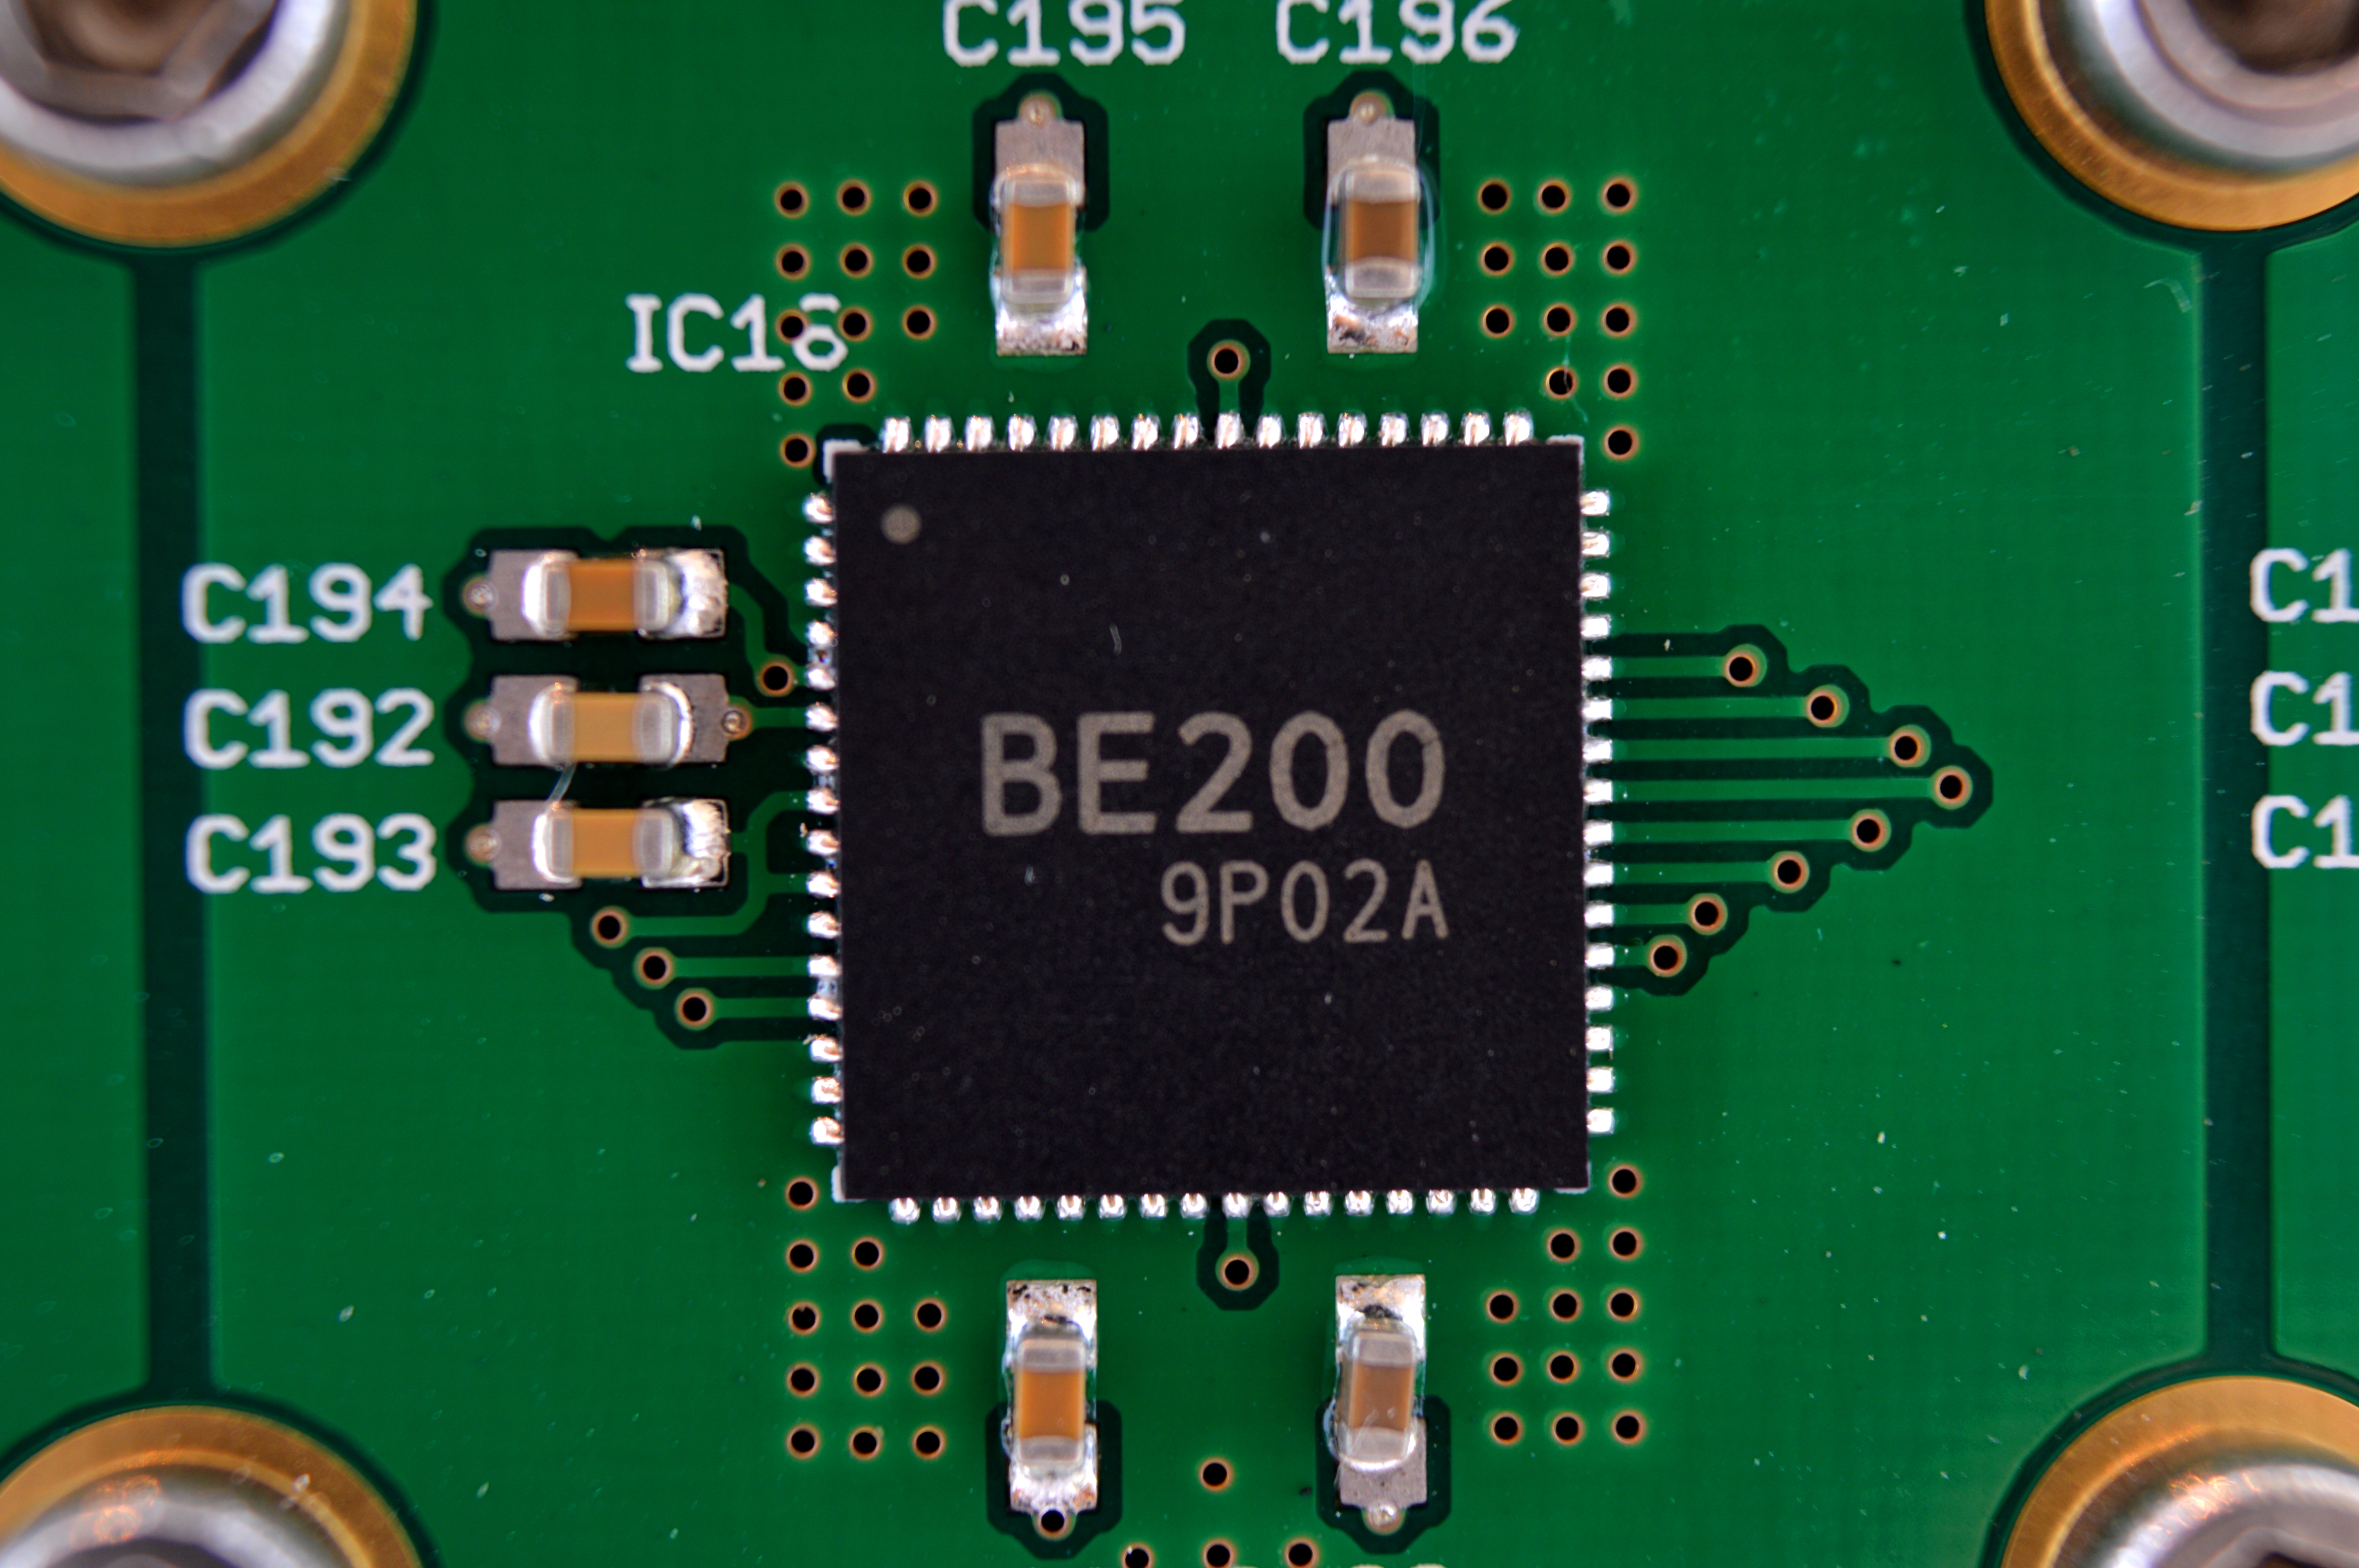
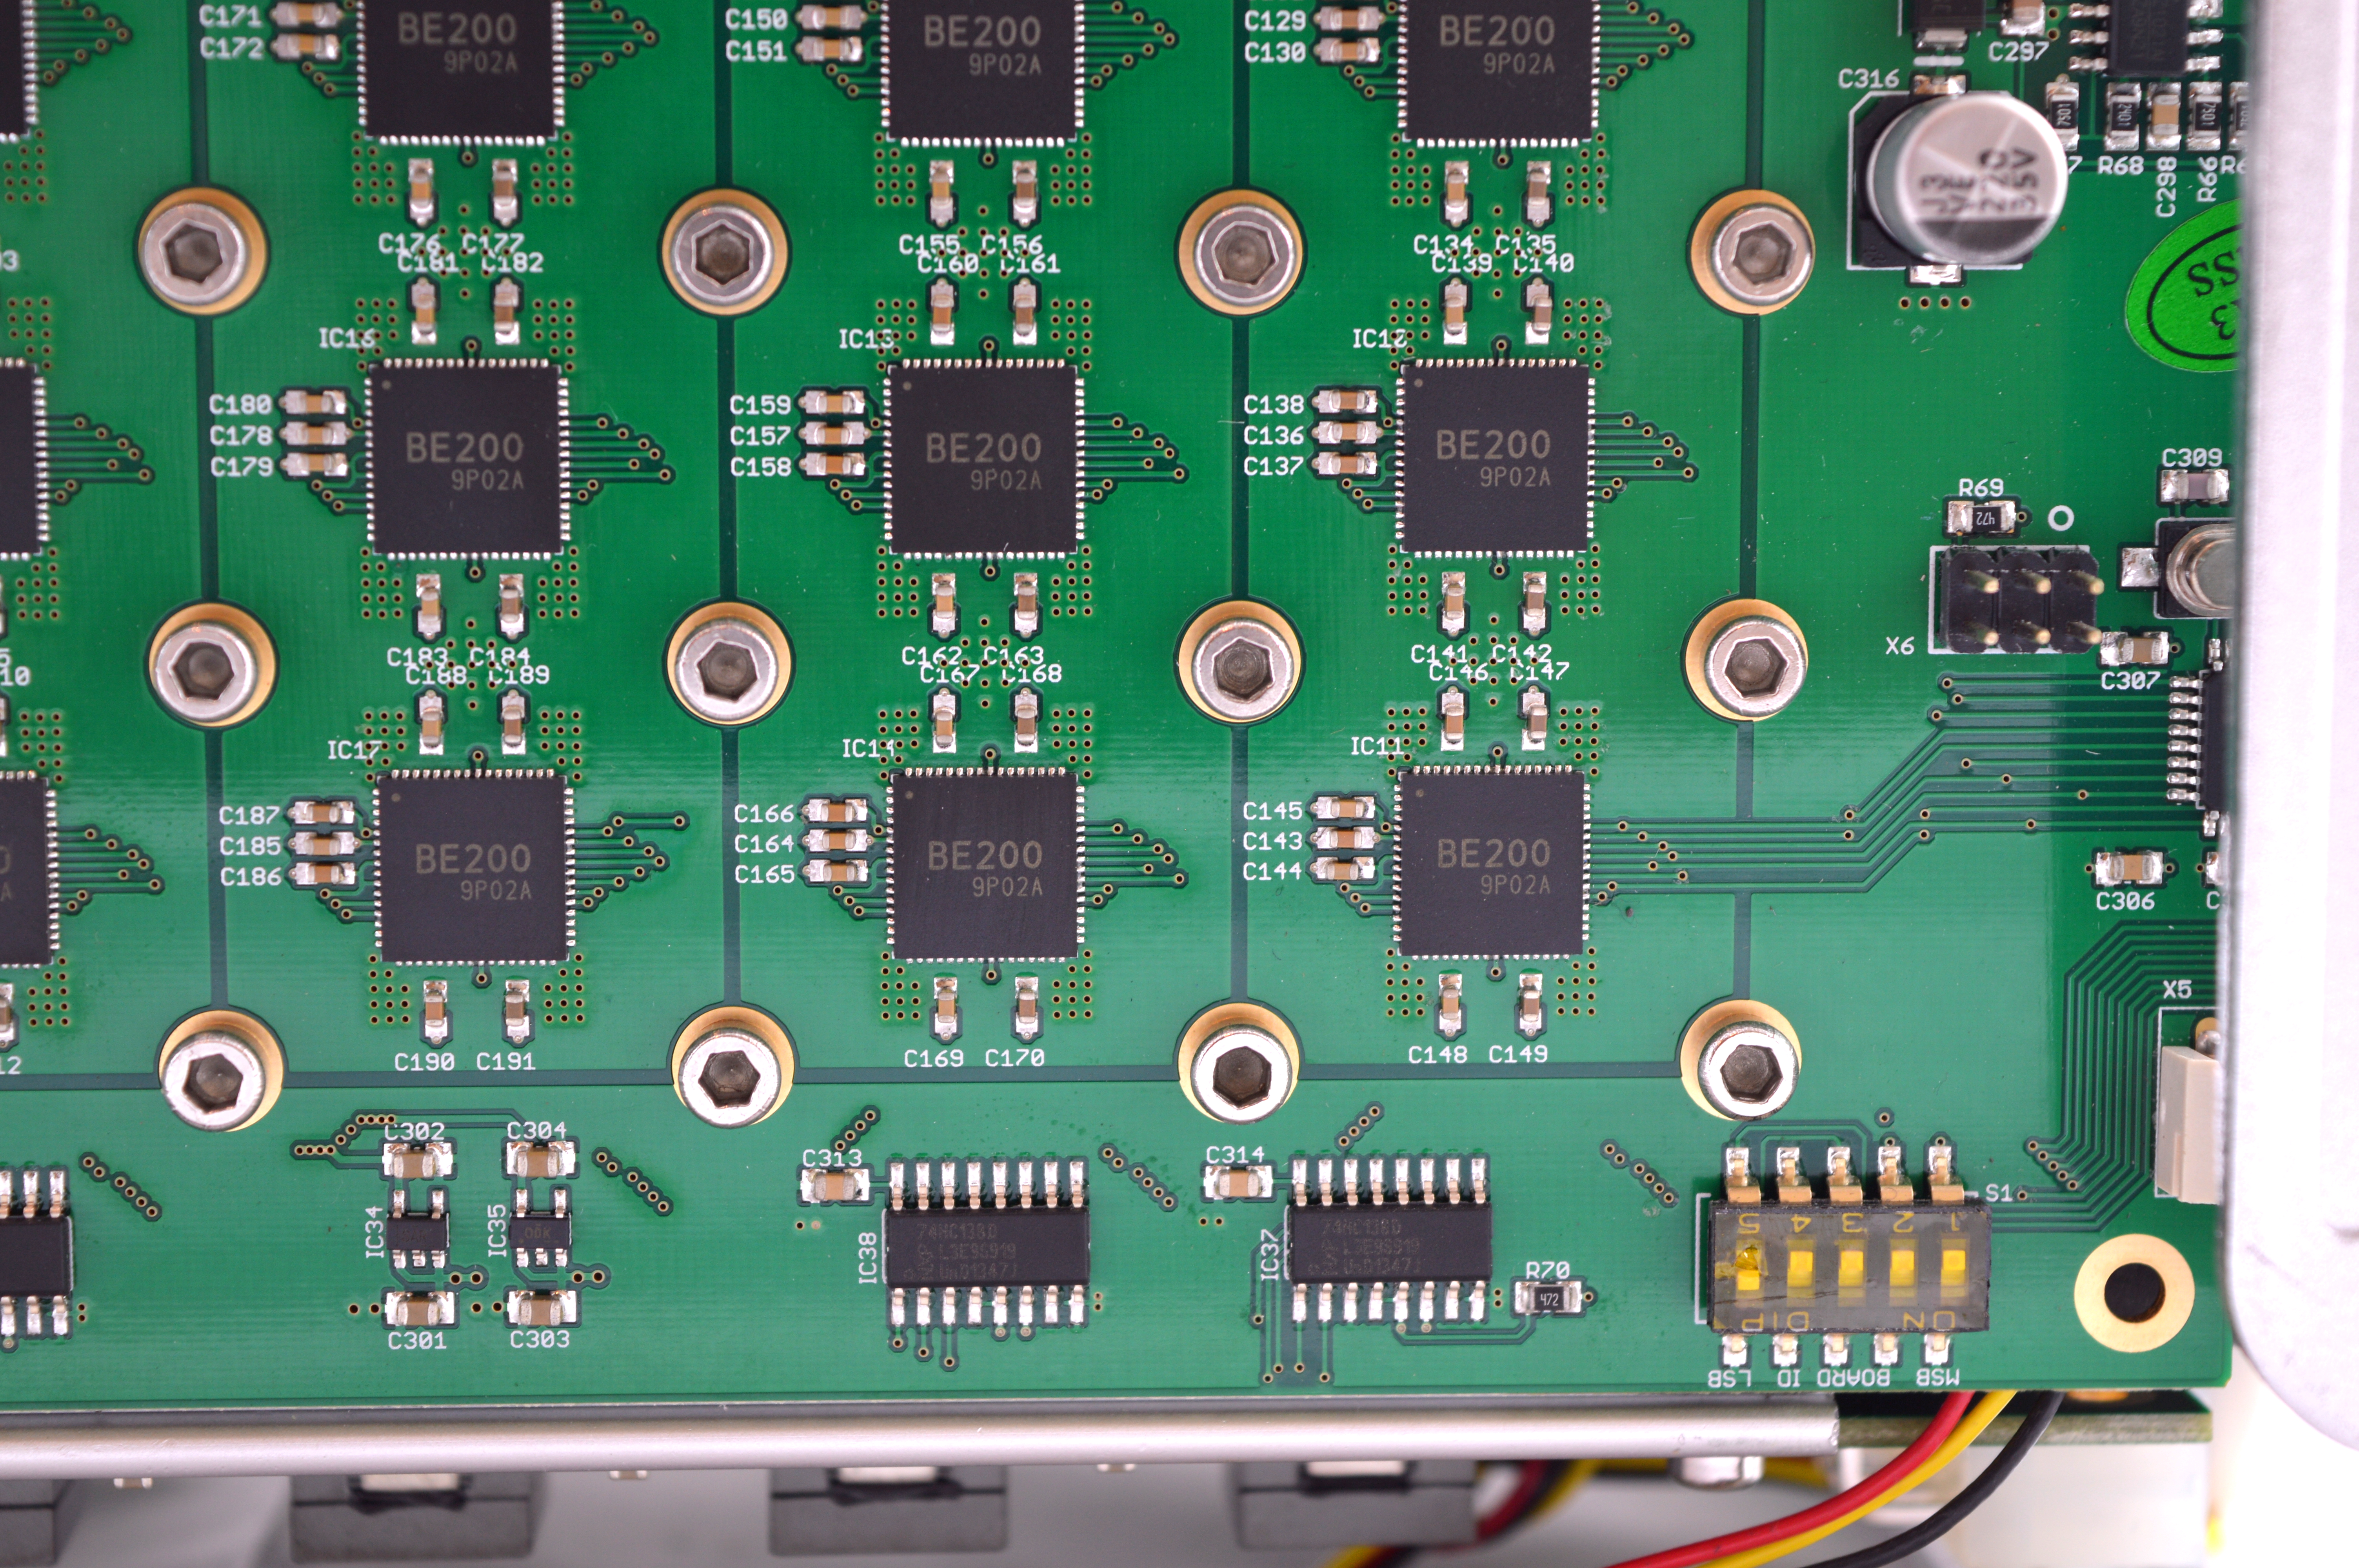
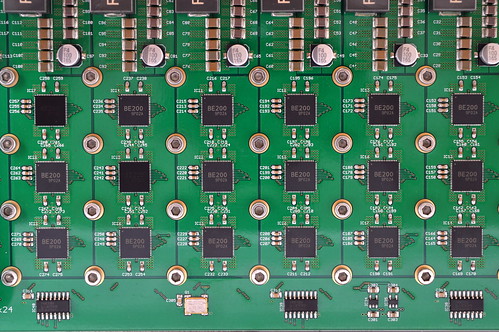
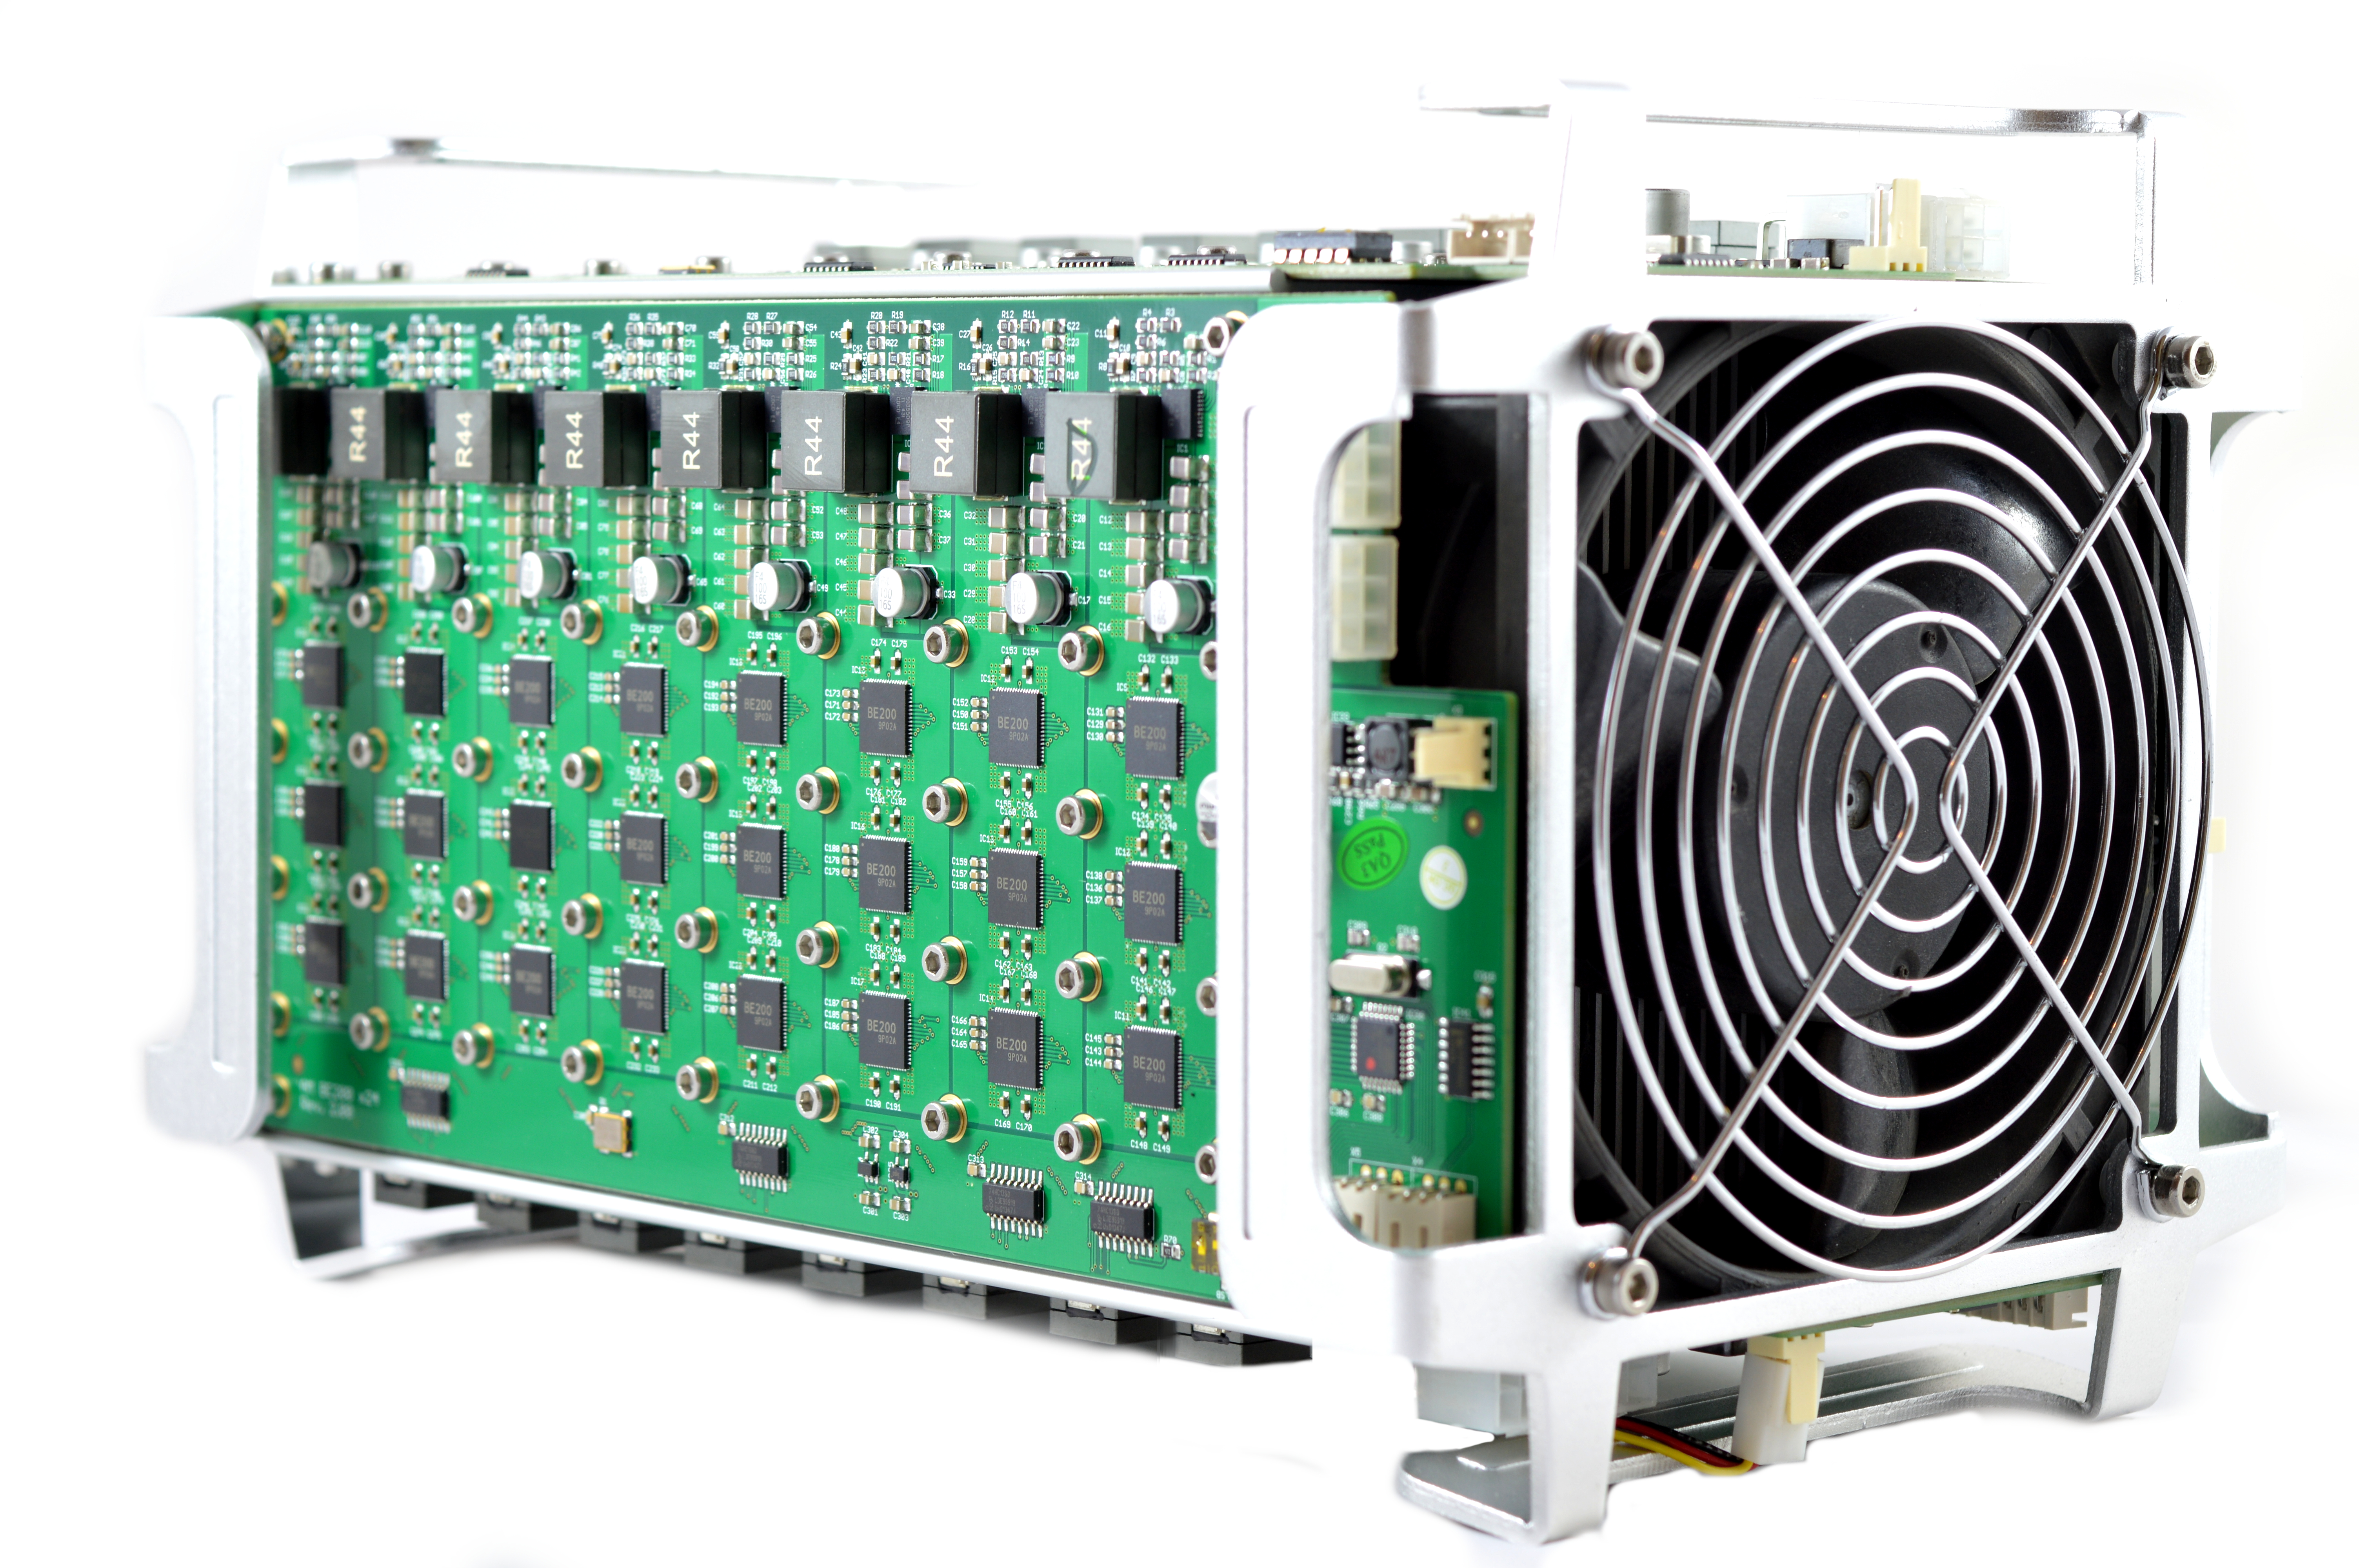
HashRatio's Tsunami is the first implementation of ASICMiner's open source x24 reference design. It features 4 hashing boards each with 24 BE200 generation
3 chips, arranged around a central aluminium core. Lightweight stands at each end allow the units to be stacked and 8 miners can be daisy chained onto one
controller. The entire design is extremely efficient and will be the new staple in mining.


0b) What You Need (top)
You will need a few accessories and a power supply to get started.
Click your flag to find everything you need to get started at Amazon!


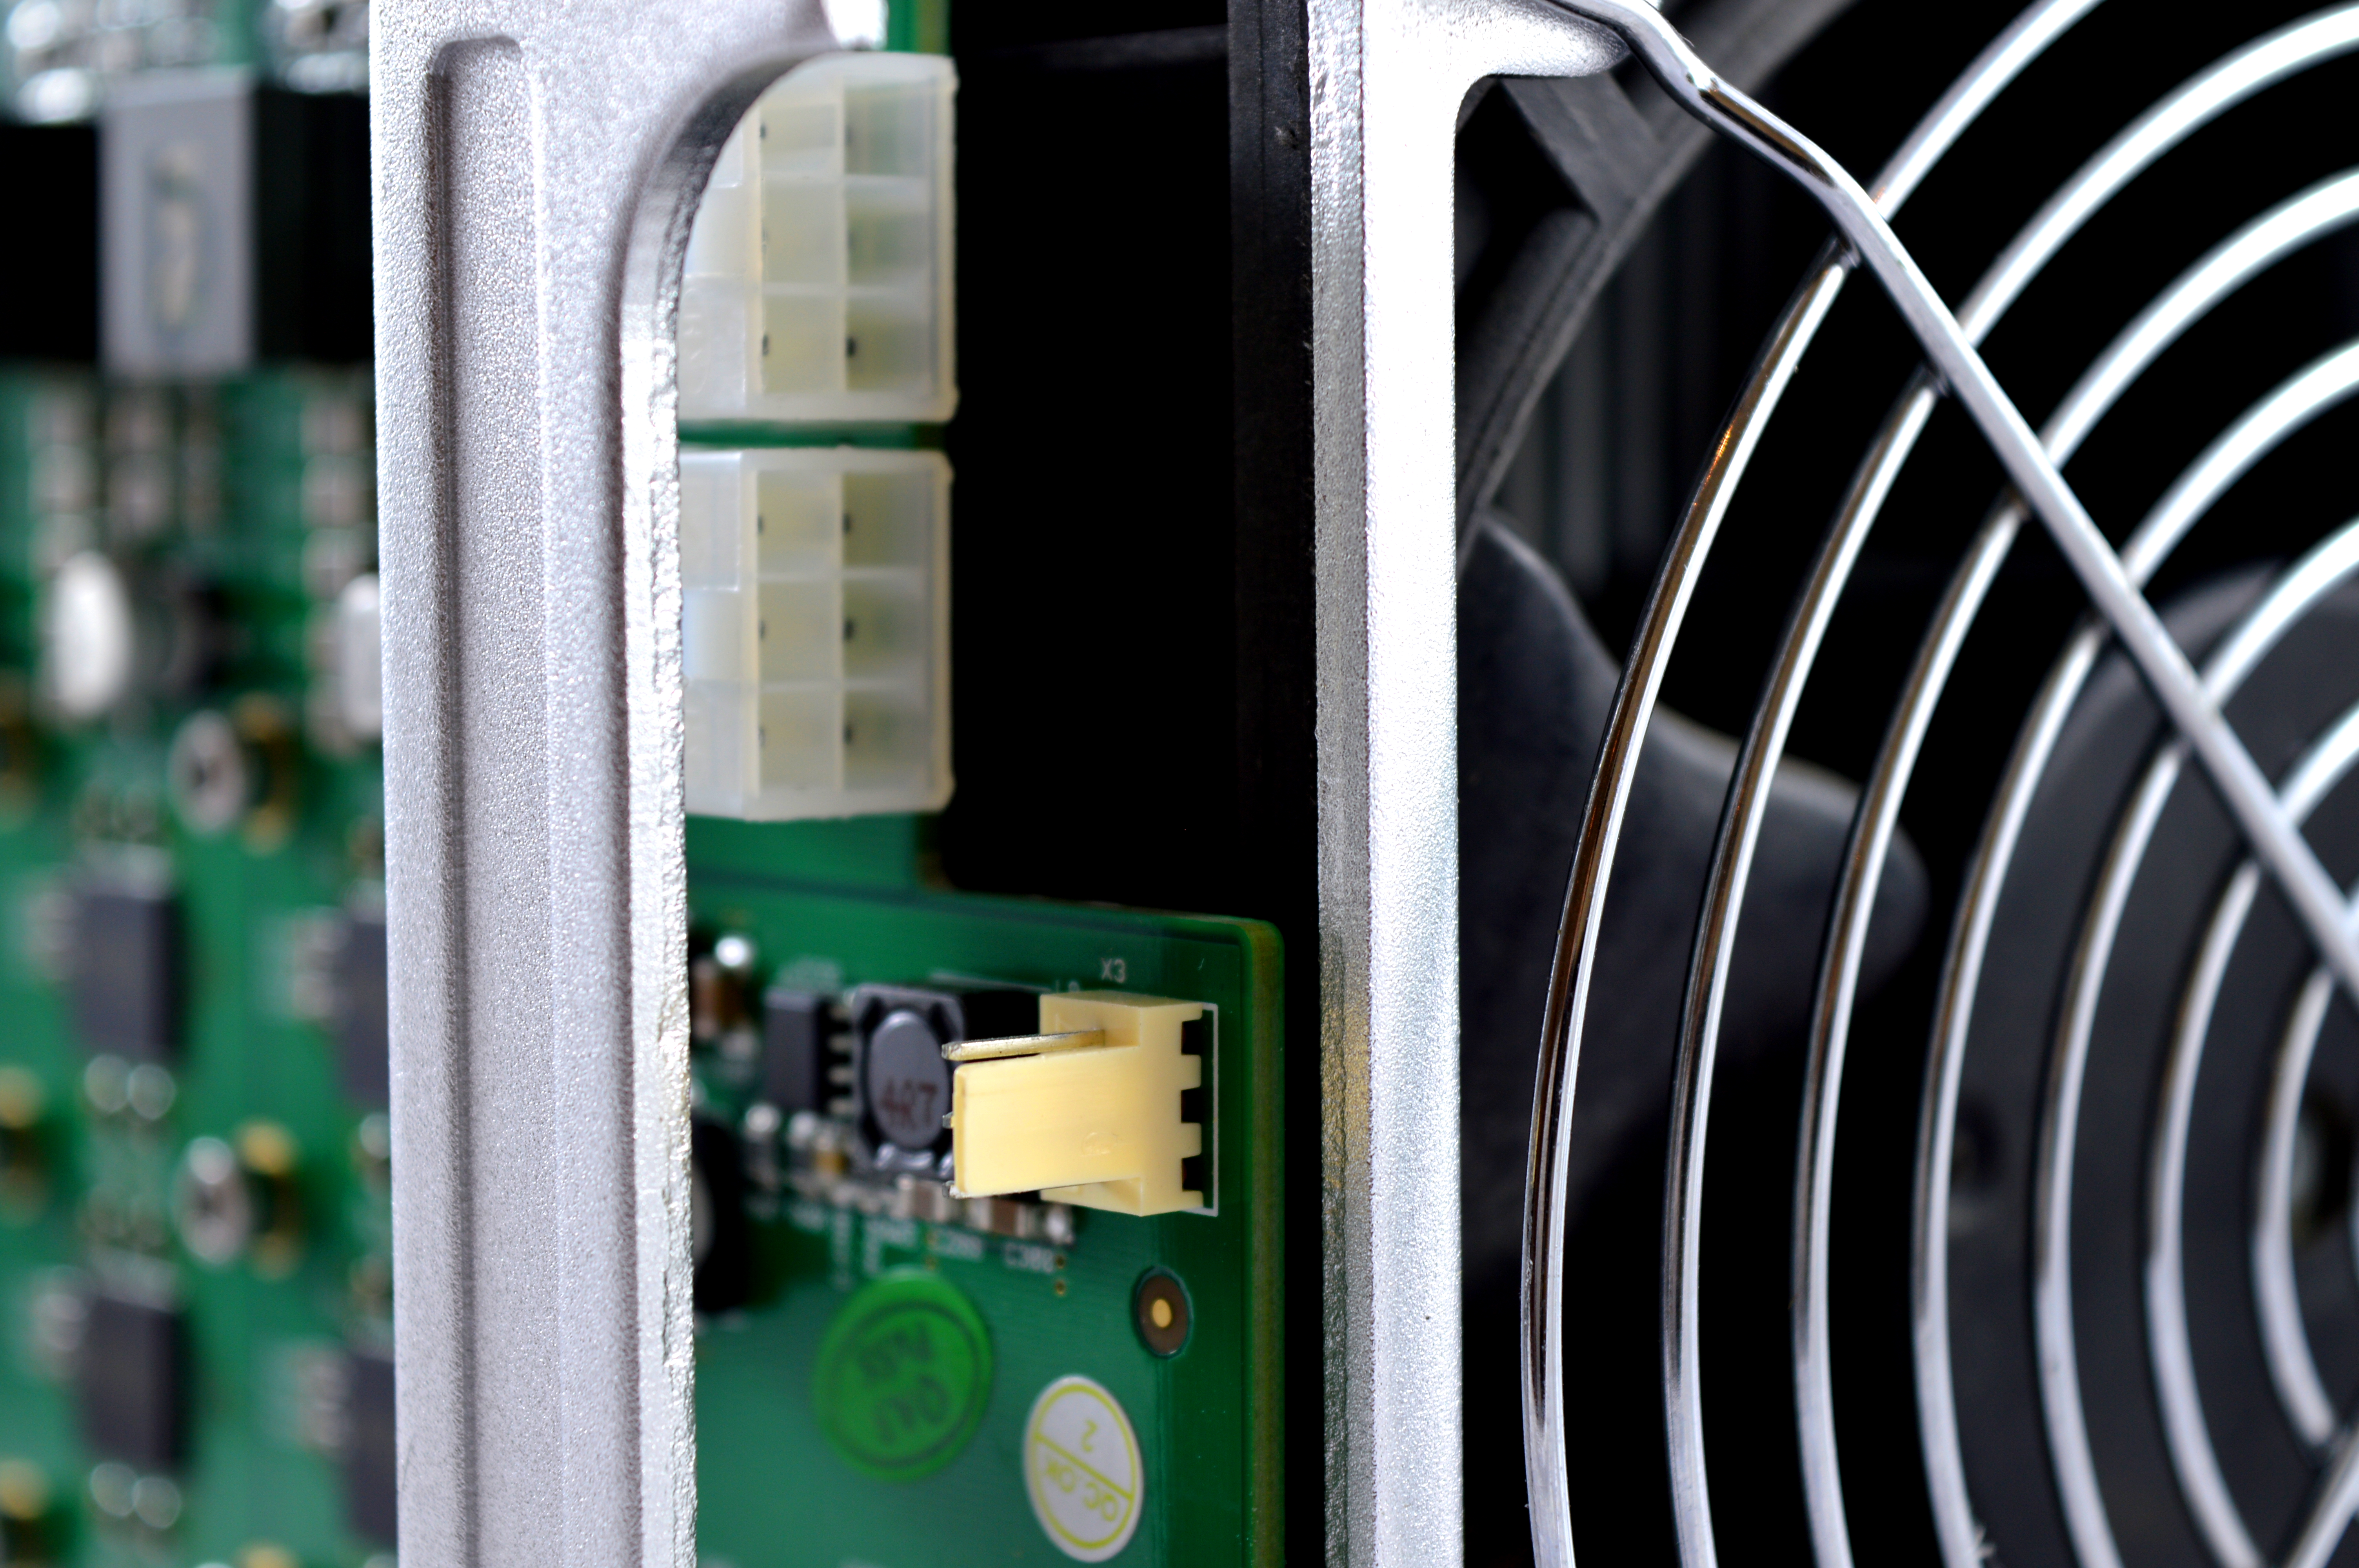
1) Powering (top)
Tsunamis do not come with a power supply, and you will need a typical computer PSU with 8xPCI-E 6 pin power connectors. Strictly only 4 PCI-E connectors are
required at stock speeds, however it will reduce cable temperatures by utilising all 8. We also need to tell the PSU to always be on, as there isn't a motherboard
to do this. Cut a paper clip into a U and insert it into the green wire and either black wire to the side of the green wire. Tape it up for safety. The power supply
will now be controlled by its switch on the rear socket.
The controller board requires a 12V 2.5mm barrel connector, 1A minimum.


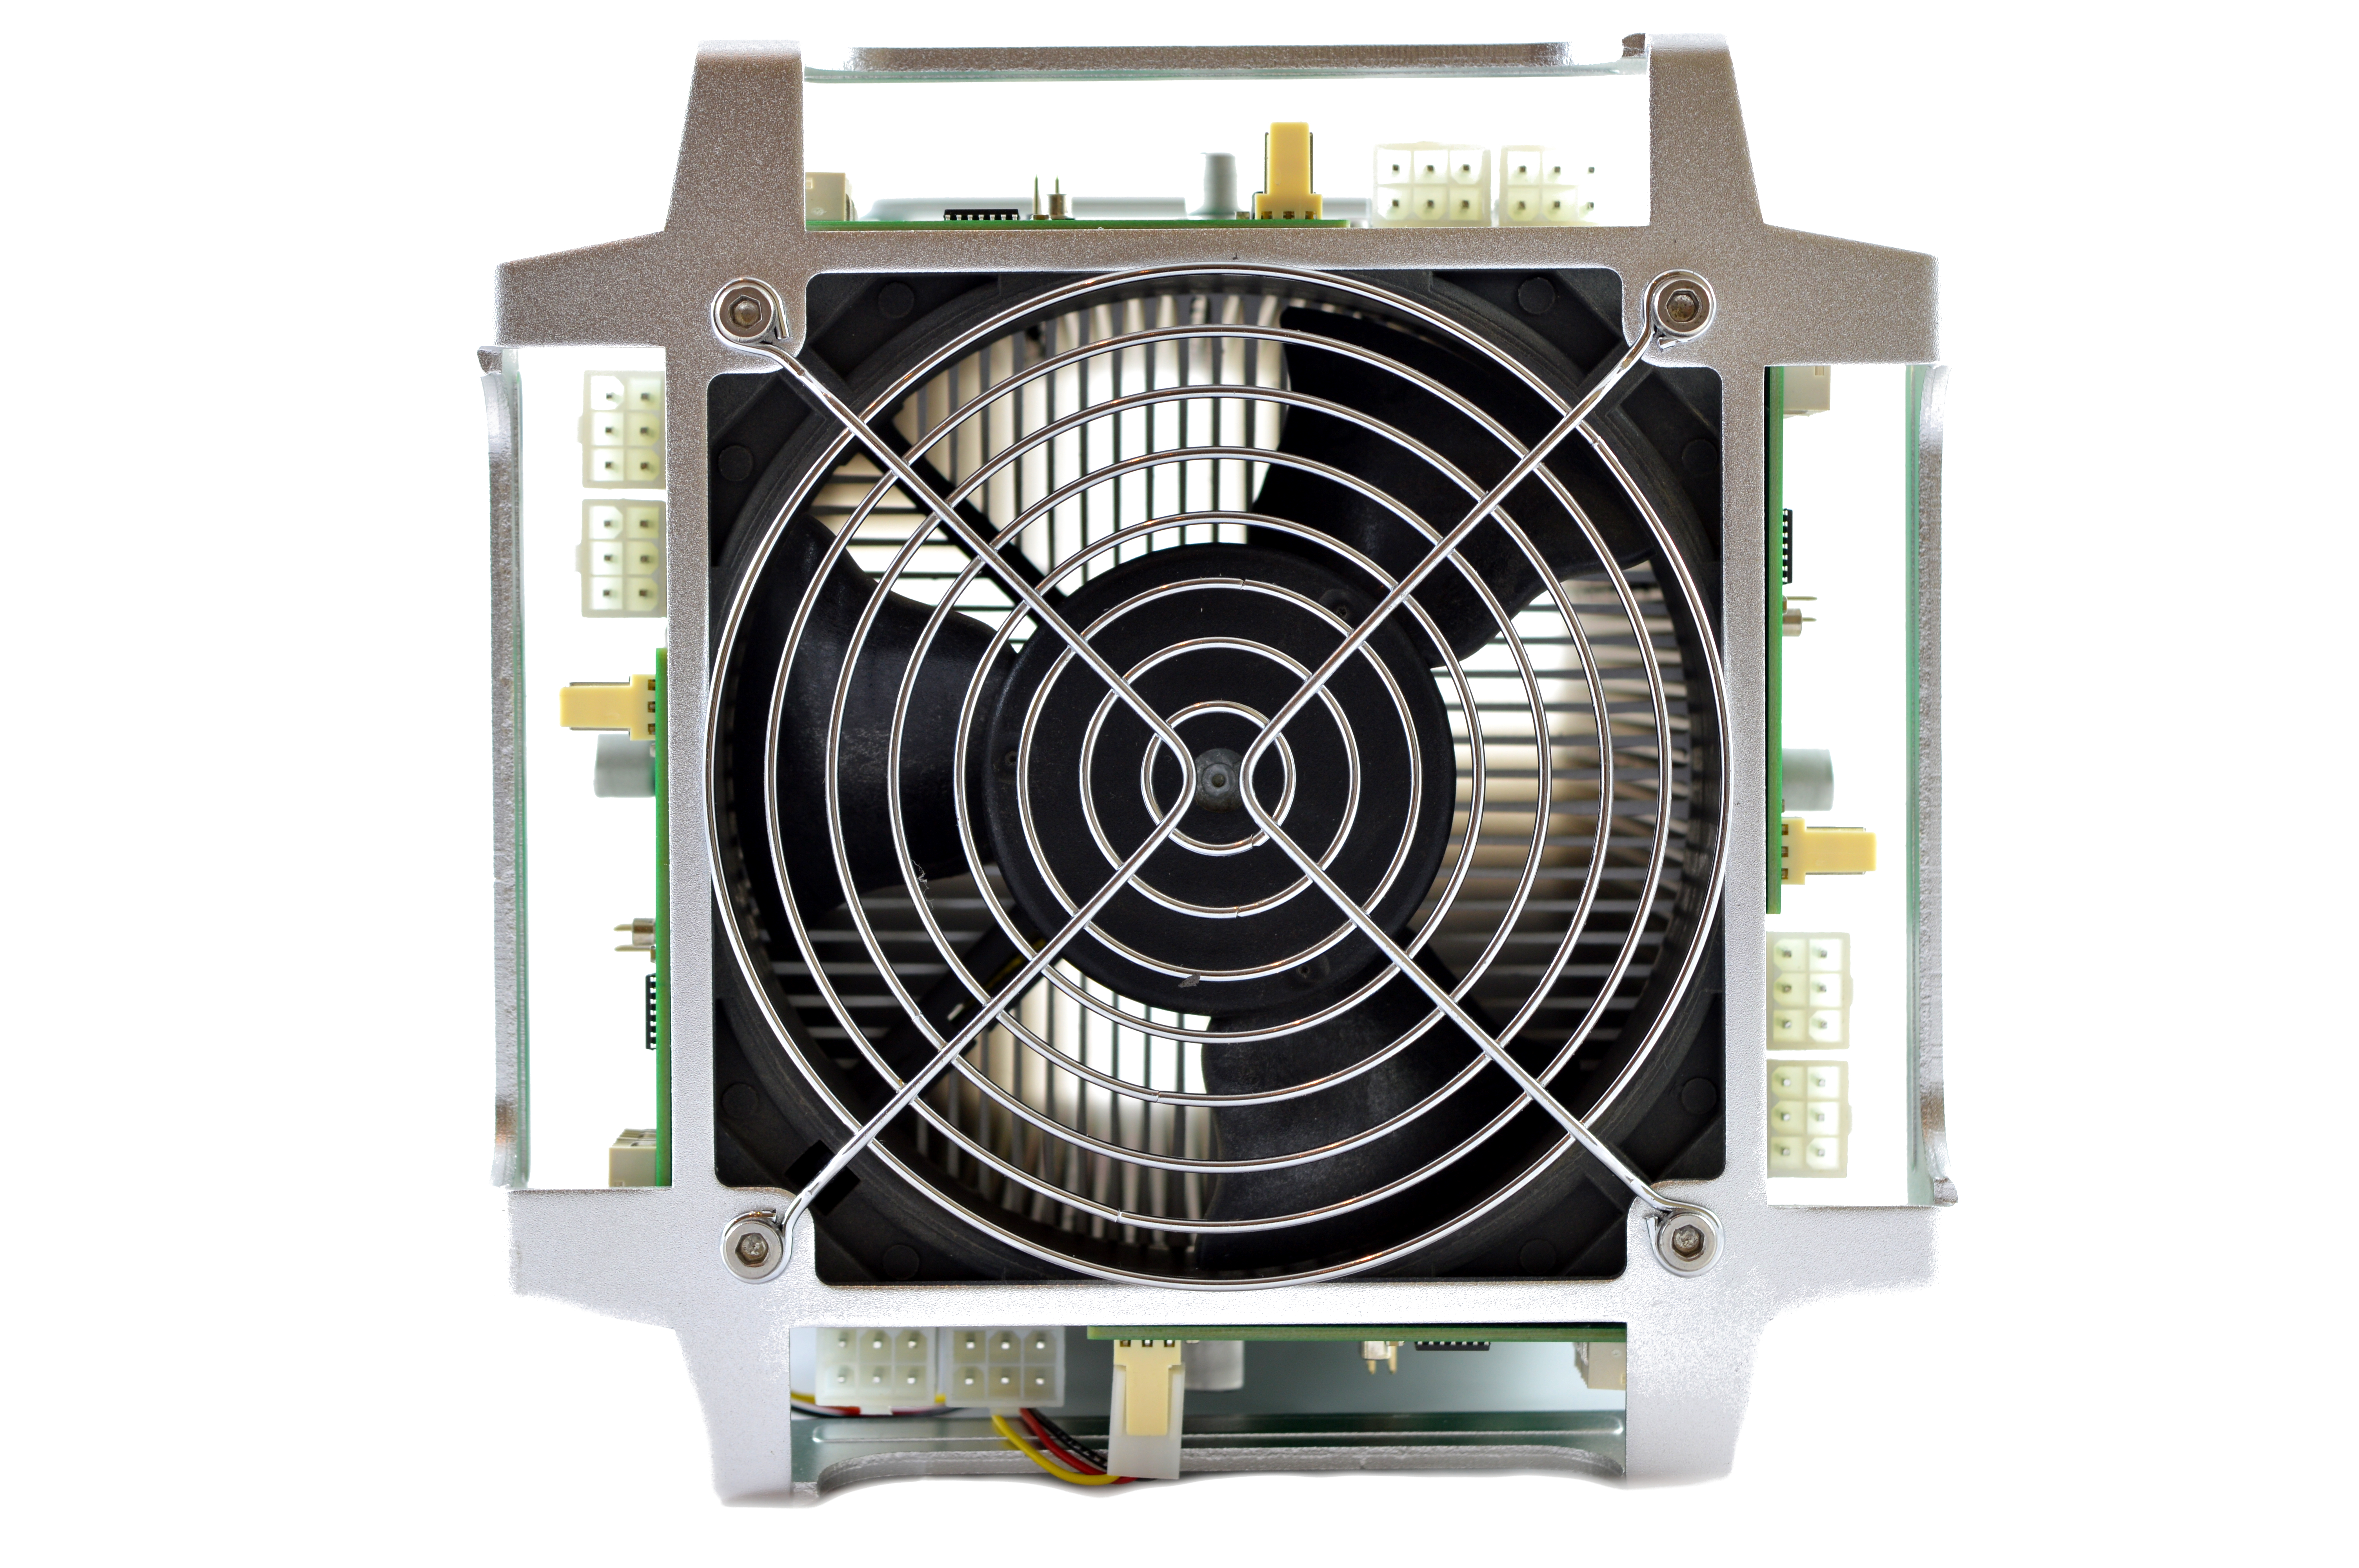
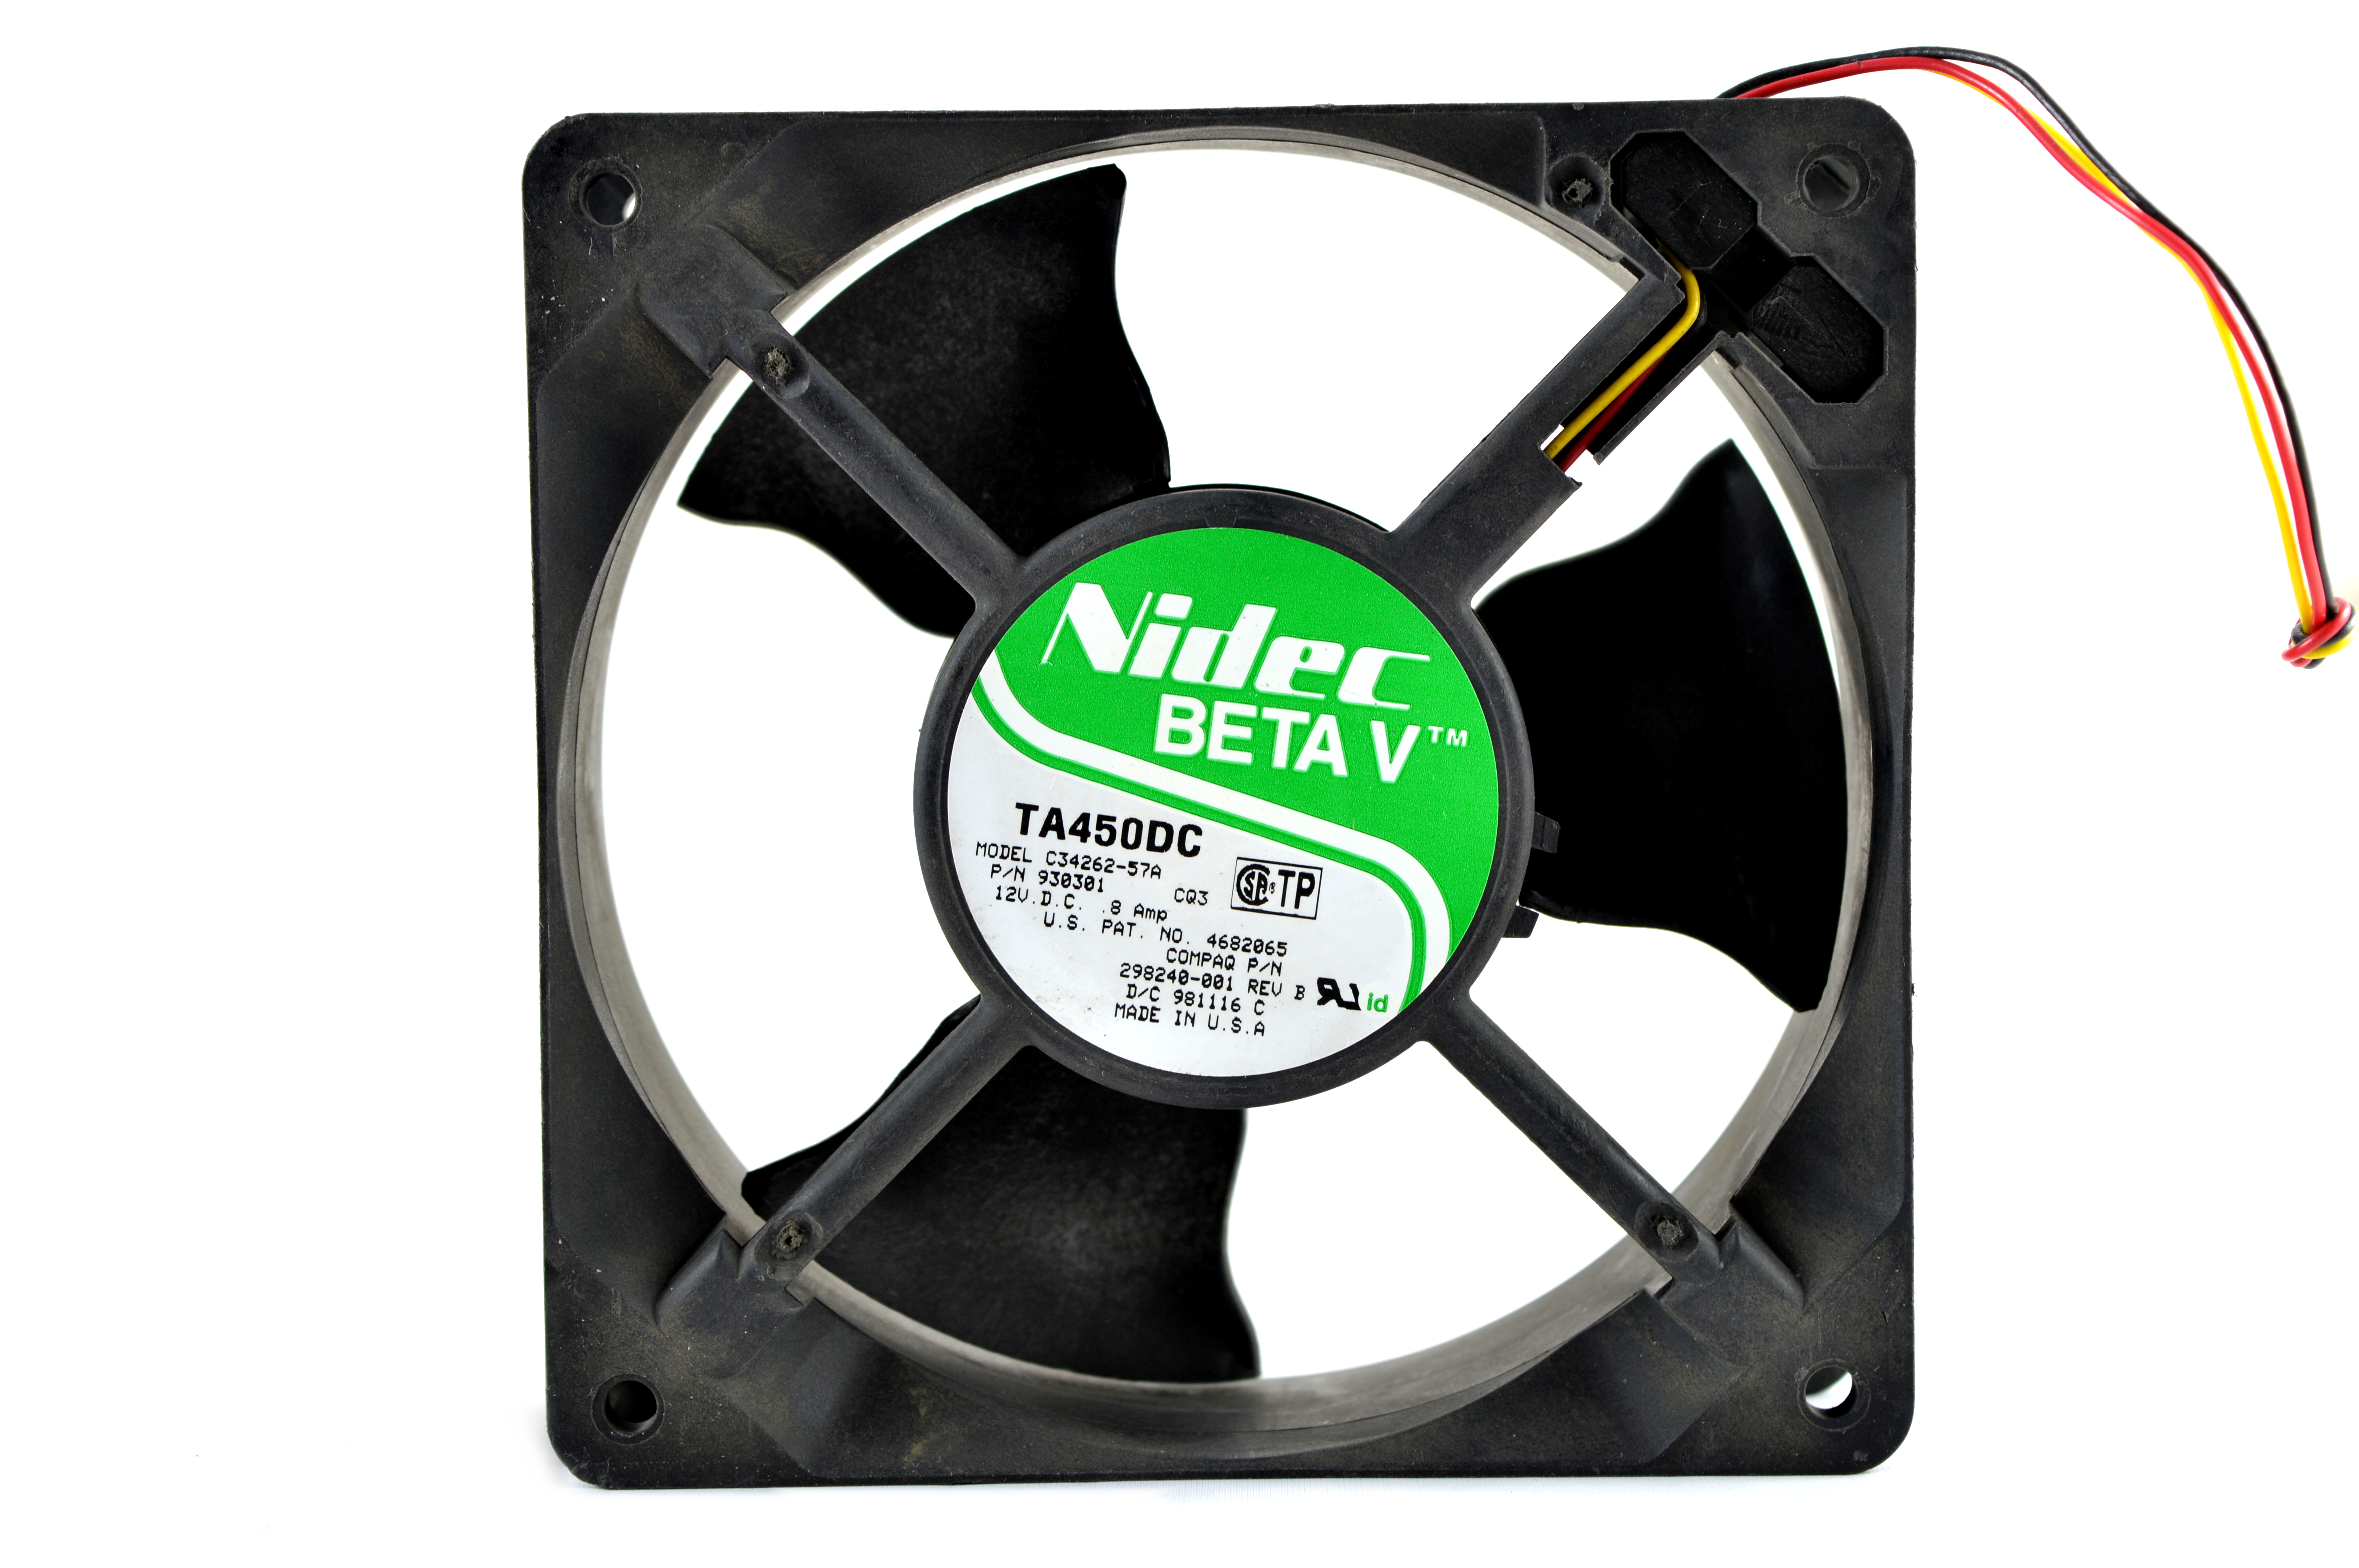
2) Cooling (top)
A single 120mm Nidec Beta V TA450DC fan is used to cool the central aluminium core. Noise levels are very reasonable considering the 800W or so of heat
being removed with a single fan. A push arrangement is used as the Tsunami is designed for server farm use where the cold aisle provides access to the cables
for the user.
It is noteworthy that the end furthest away from the fan may become very hot to the touch extremely hot to the touch (including the handles) during
operation, so please be careful during handling and maintenance.


3) Case (top)
The central aluminium heatsink provides the core of the frame and structure of the miner, and is supplemented by radial feet at either end. Both are
constructed of low weight aluminium, giving an overall miner weight of just 6KG for a near 1TH unit. Tsunamis are stackable both side to side and top to
bottom. The addition of a rubber strip between miners would be beneficial to reduce vibration.


4) Configuration (top)
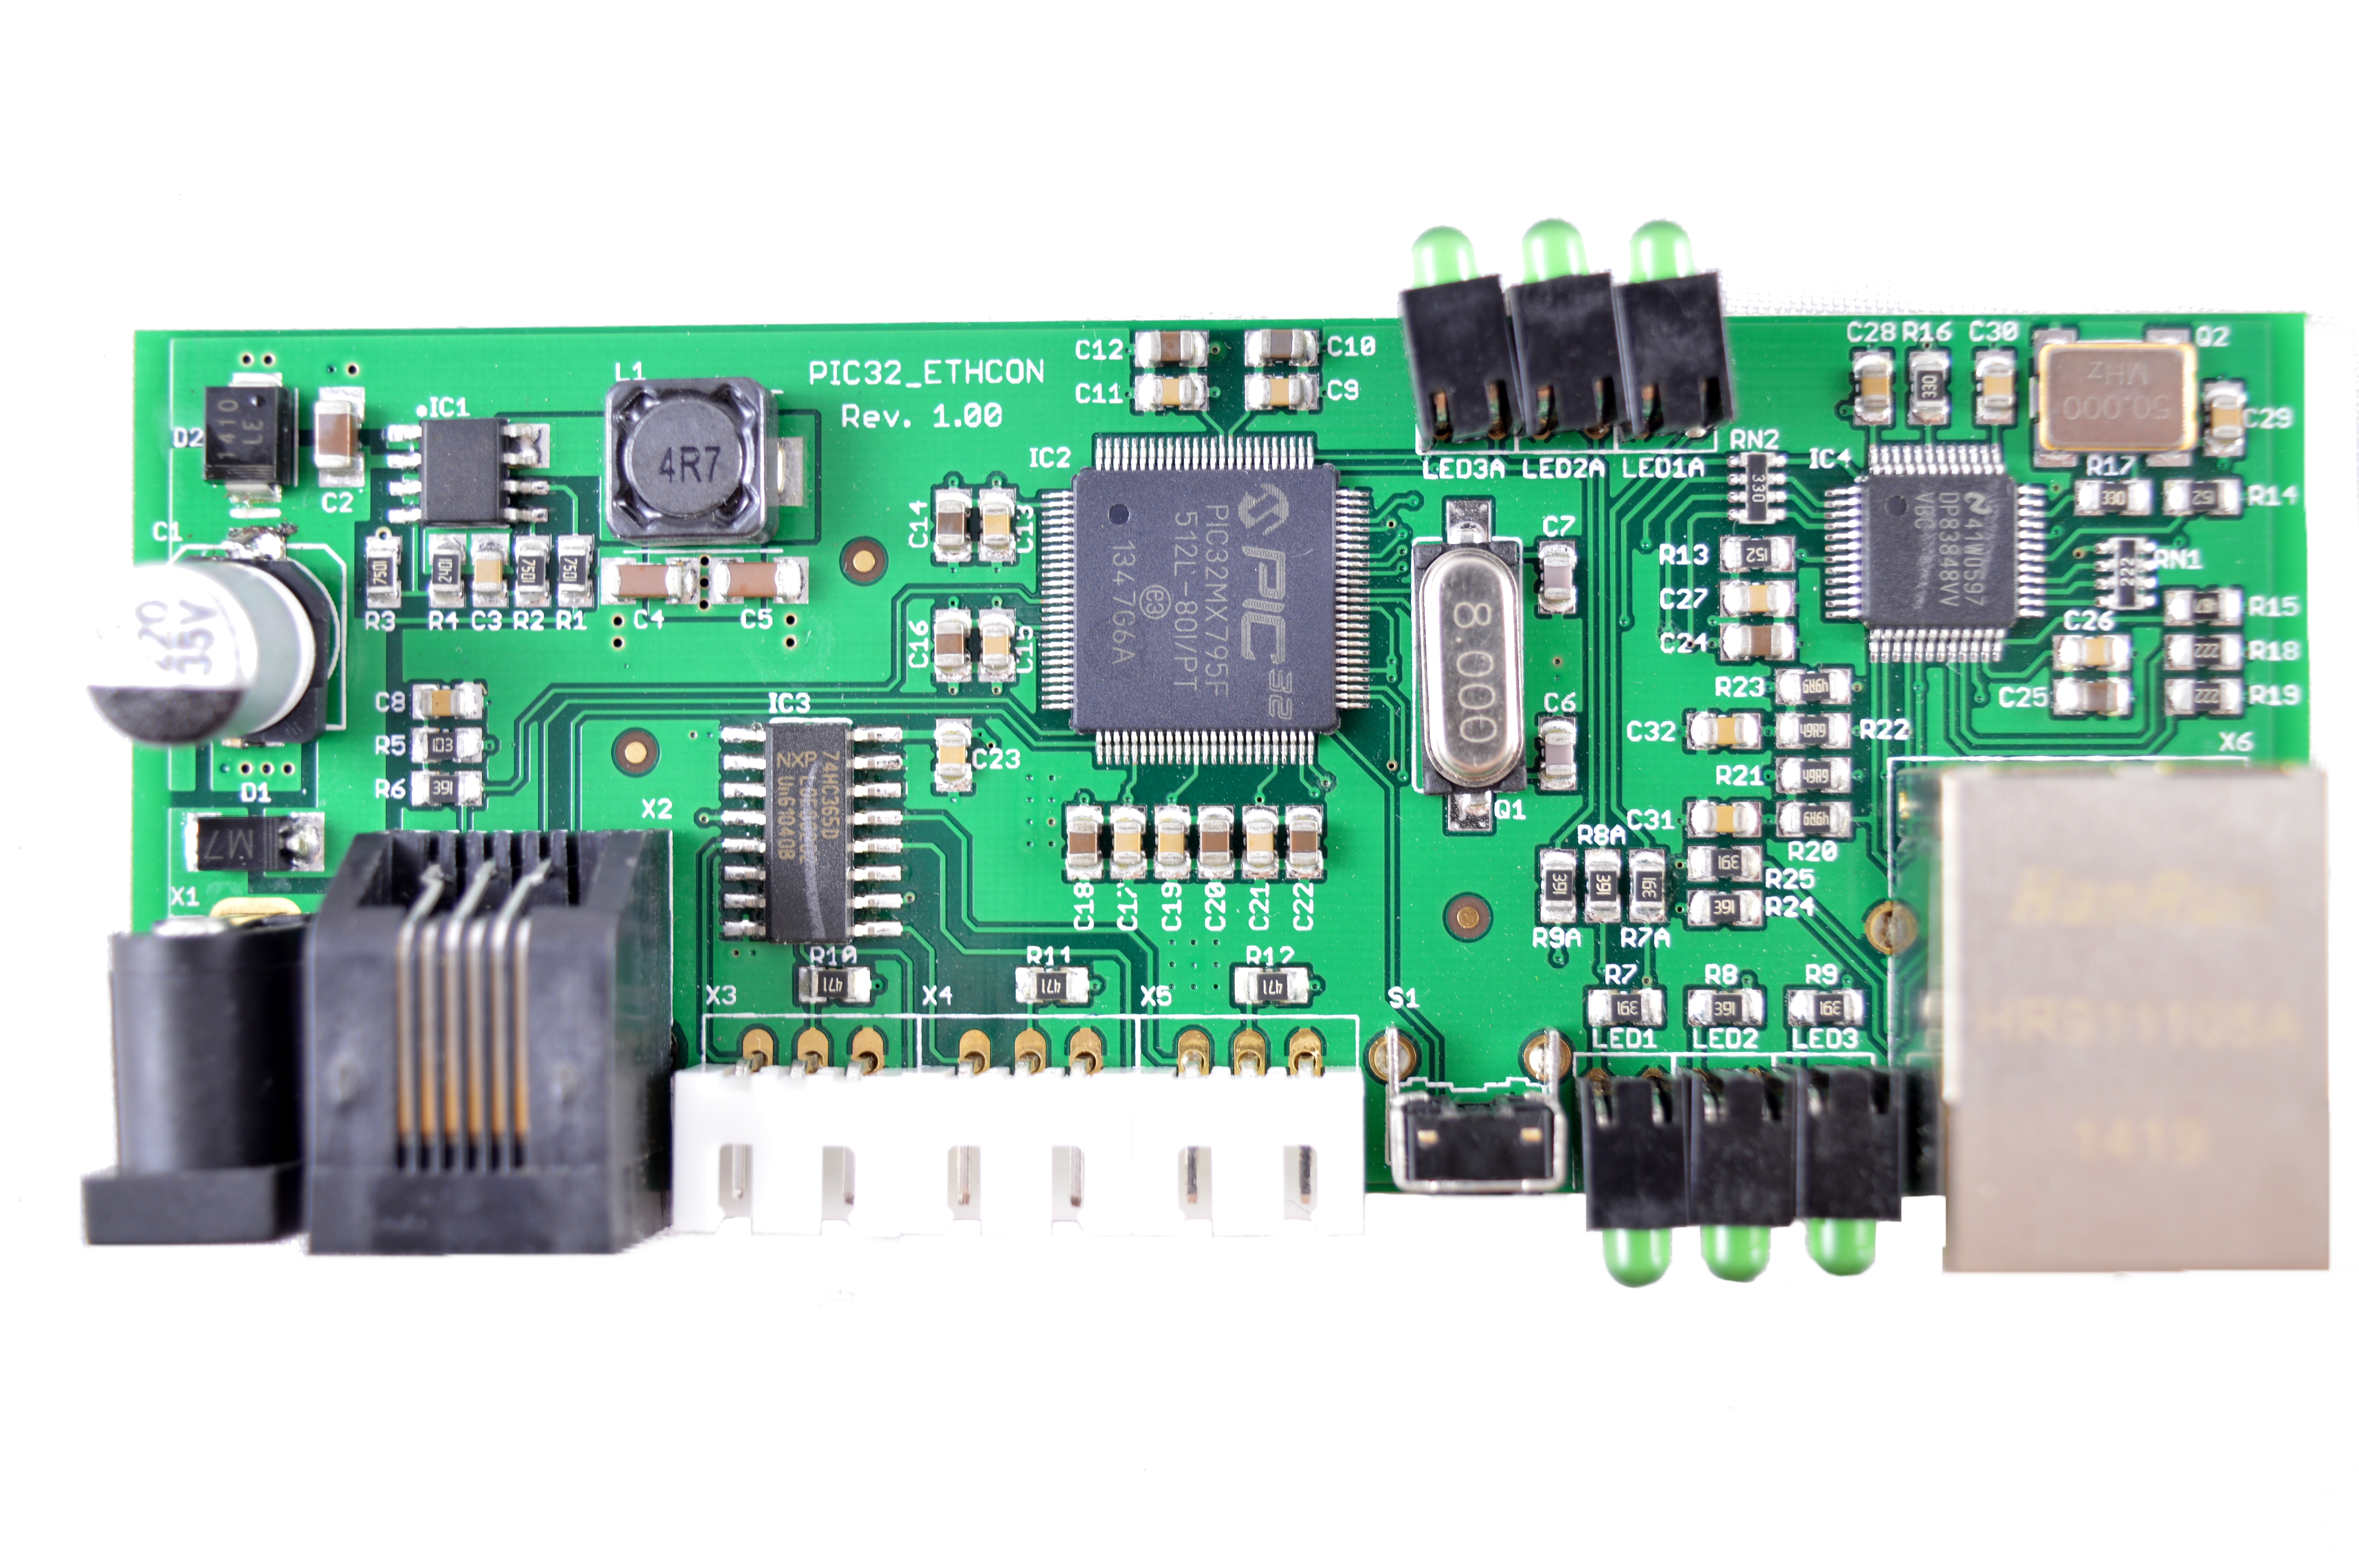
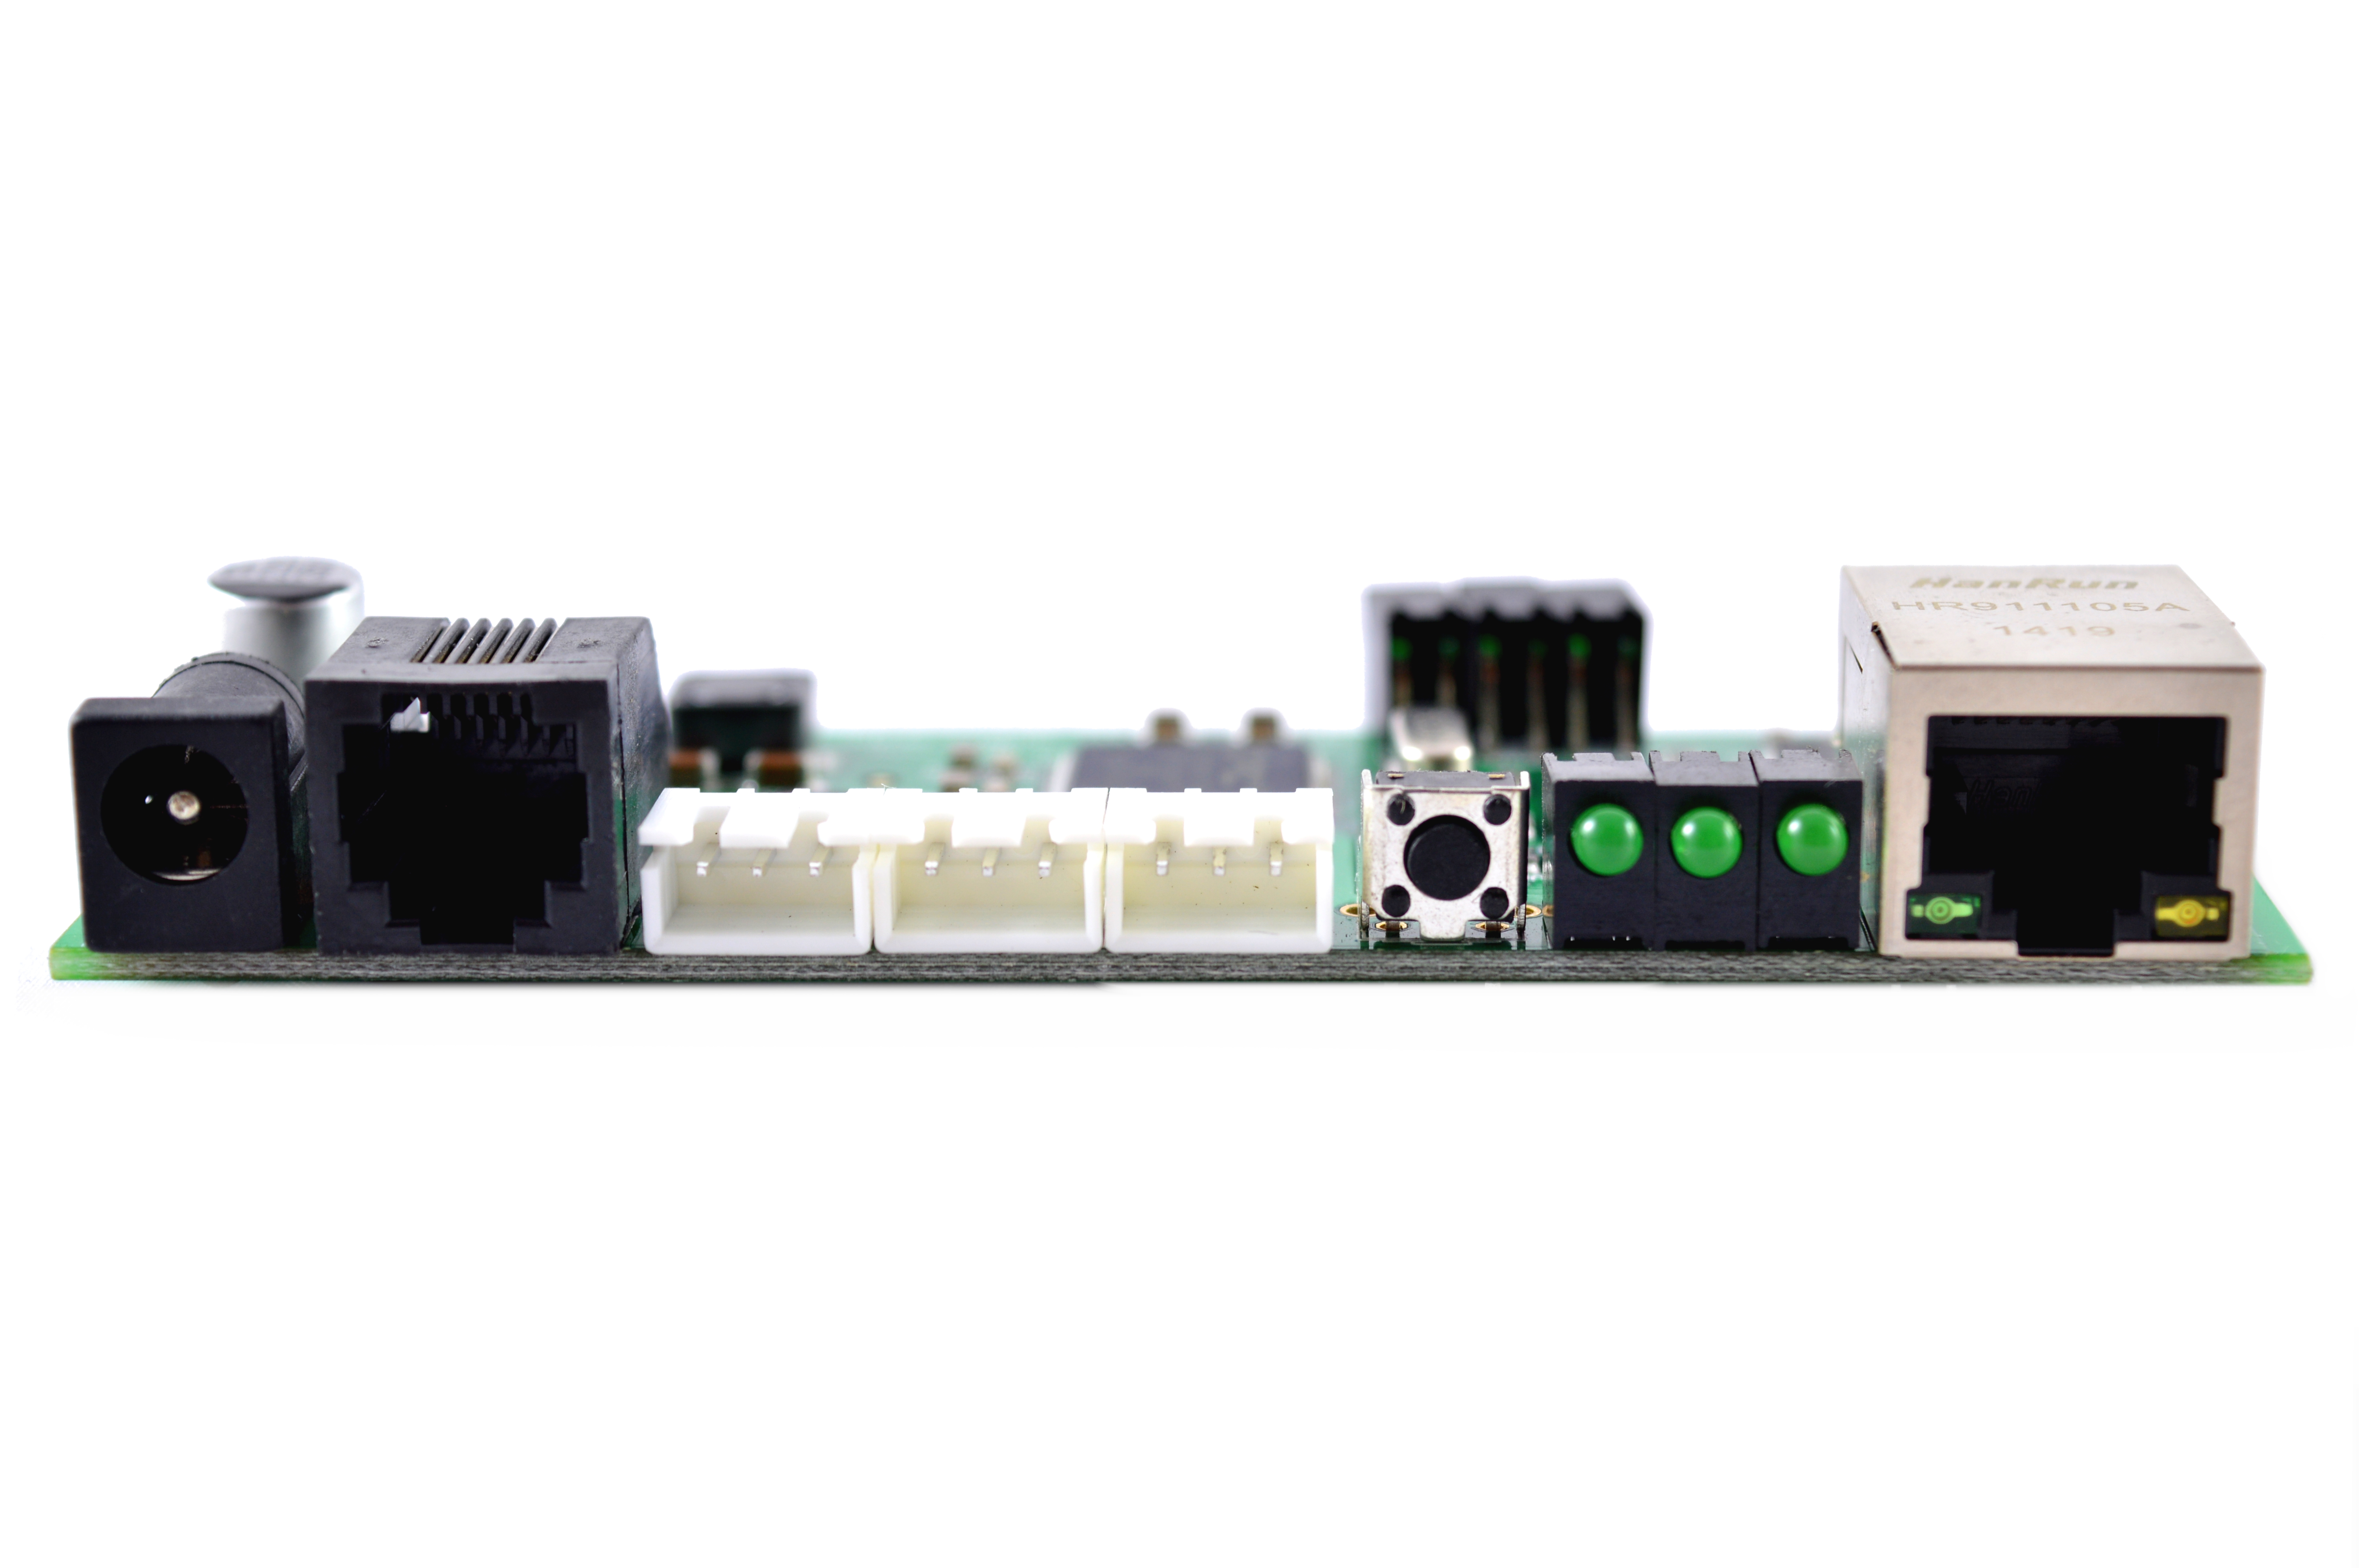
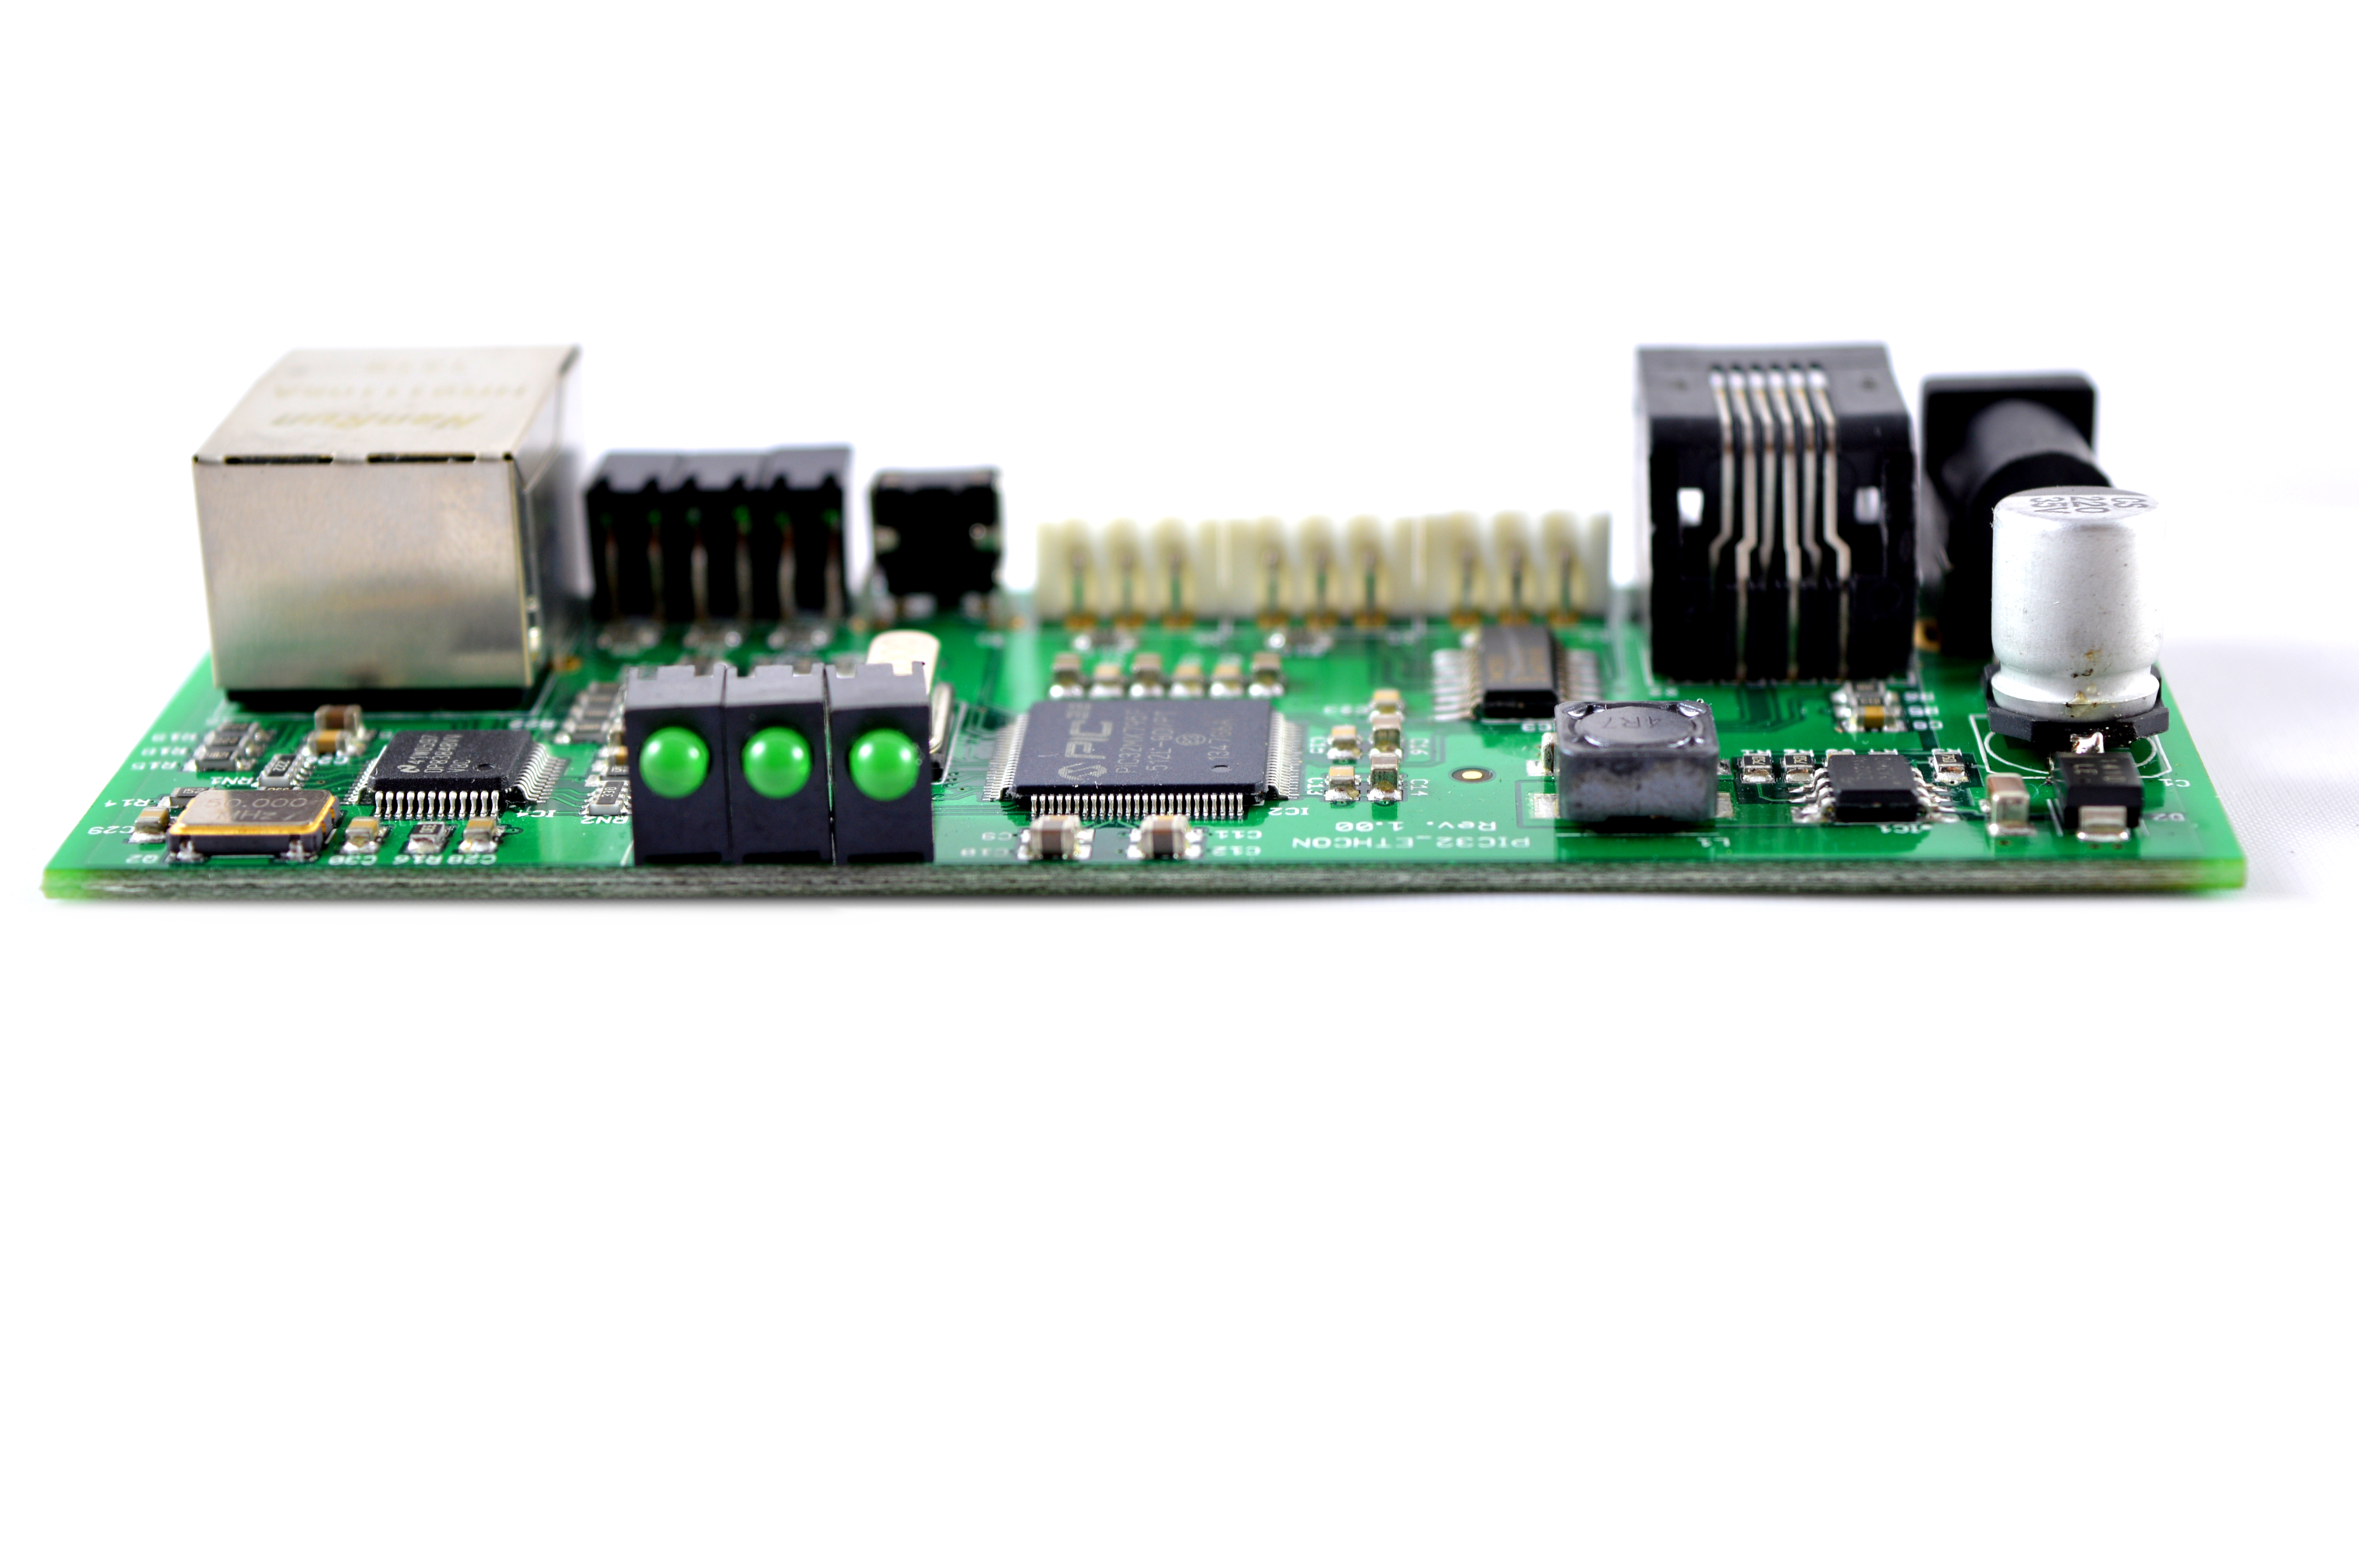
An external 32bit PIC board is used as the controller, and can handle 8 daisy chained Tsunamis.
Wiring:
Configuration:
Alternative Subnet Change:
Antpool Register!


5) Troubleshooting (top)


Legal disclaimer: This information is for general guidance and does not constitute expert advice. We are not responsible if you, your property or a third
party is injured or damaged as a result of any interaction with this information, and no warranty is provided. All text and images are covered by copyright.
6) Where to buy (top)

Nicely formatted version available at dogiecoin.com!
Contents:
0a) What to Expect
0b) What You Need
1) Powering
2) Cooling
3) Case
4) Configuration
5) Troubleshooting
6) Where to buy
0a) What to Expect (top)
HashRatio's Tsunami is the first implementation of ASICMiner's open source x24 reference design. It features 4 hashing boards each with 24 BE200 generation
3 chips, arranged around a central aluminium core. Lightweight stands at each end allow the units to be stacked and 8 miners can be daisy chained onto one
controller. The entire design is extremely efficient and will be the new staple in mining.
| Chips | 96x ASICMiner Gen3 |
| Hashrate | ~830GH, 920GH (OC) |
| Rated Voltage | 12V |
| Rated Current | 75A |
| Power.Consumption | ~900W, 1025W (OC) |

0b) What You Need (top)
You will need a few accessories and a power supply to get started.
Click your flag to find everything you need to get started at Amazon!
1) Powering (top)
Tsunamis do not come with a power supply, and you will need a typical computer PSU with 8xPCI-E 6 pin power connectors. Strictly only 4 PCI-E connectors are
required at stock speeds, however it will reduce cable temperatures by utilising all 8. We also need to tell the PSU to always be on, as there isn't a motherboard
to do this. Cut a paper clip into a U and insert it into the green wire and either black wire to the side of the green wire. Tape it up for safety. The power supply
will now be controlled by its switch on the rear socket.
The controller board requires a 12V 2.5mm barrel connector, 1A minimum.


2) Cooling (top)
A single 120mm Nidec Beta V TA450DC fan is used to cool the central aluminium core. Noise levels are very reasonable considering the 800W or so of heat
being removed with a single fan. A push arrangement is used as the Tsunami is designed for server farm use where the cold aisle provides access to the cables
for the user.
It is noteworthy that the end furthest away from the fan may become very hot to the touch extremely hot to the touch (including the handles) during
operation, so please be careful during handling and maintenance.
3) Case (top)
The central aluminium heatsink provides the core of the frame and structure of the miner, and is supplemented by radial feet at either end. Both are
constructed of low weight aluminium, giving an overall miner weight of just 6KG for a near 1TH unit. Tsunamis are stackable both side to side and top to
bottom. The addition of a rubber strip between miners would be beneficial to reduce vibration.


4) Configuration (top)
An external 32bit PIC board is used as the controller, and can handle 8 daisy chained Tsunamis.
Wiring:
- Plug in an ethernet cable from the controller board to you router.
- Plug in the three wired long cable from the miner to the white socket on the controller board closest to the ethernet port.
- If you have more than one Tsunami on the same controller, see the troubleshooting section at the bottom.
- Plug in all eight PCI-E connectors into the Tsunami.
- Plug in the 12V barrel connector into the controller board.
Configuration:
- Power on the power supply using its switch at the back.
- Make sure or your router's subnet is 0, ie 192.168.0.x. If not then change it to 0, this is just temporary. ***If this is not possible, see below***
- Using a browser, navigate to 192.168.0.254:8000 - this goes to the Tsunami's configuration page.
- Navigate to Settings.
- Change IP to something memorable, and on your preferred subnet.
- Change gateway to the IP of your router.
- Change primary DNS to the IP of your router.
- Change secondary DNS to "8.8.8.8".
- Enter Pool URL in the format as below. **There may be some issues with some pools at the moment, ghash definitely works**.
- Enter the port of your pool.
- Enter your miner username and password.
- Set ASIC clock at 270 for stock speeds and 300 for overclocked speeds.
- Click update and restart.
- Navigate back to the IP of the miner you set to check mining started.
- You can then change your router subnet back to whatever you are used to using.
Alternative Subnet Change:
- Unplug your computer from all internet sources.
- Plug in an ethernet cable from the controller to your computer.
- Navigate to Control Panel -> Network and Sharing Centre -> Change Adapter Settings.
- Right click on your ethernet adapter -> Properties.
- Click on "Internet Protocol Version 4" and click properties.
- Select "Use the following IP address" and enter the following:
- IP Address: 192.168.0.1, Subnet Mask: 255.255.255.0, Default Gateway: 192.168.0.254.
- Plug in an ethernet cable from the controller to you router.
- Restart the configuration instructions as above.
Antpool Register!
Code:
Servers : stratum.antpool.com:3333
User : username.worker or username_worker - auto creates workers!
Password: anypassword
BTCGuild Register!User : username.worker or username_worker - auto creates workers!
Password: anypassword
Code:
Servers : stratum.btcguild.com:3333
User : username_worker
Password: anypassword
GHash IO Register!User : username_worker
Password: anypassword
Code:
Servers : us1.ghash.io:3333
User : username.worker - auto creates workers!
Password: anypassword
User : username.worker - auto creates workers!
Password: anypassword

5) Troubleshooting (top)
| Problem | Solution |
| How.do.I.set.up.more.than.one.miner.on.one.controller? | - There is a 5 bit switch on each hashing board which must be configured to be unique in order for the controller to detect it. Set the first miner's boards as "MINER1" in the below diagram, the second's as "MINER2" etc. The long cable from one unit should be plugged into the empty connection on the other to daisy chain the connections on the other.  |
| How do I reset settings to default? | - Hold and press the black push button on the controller board. |
| My.power.supply's.cables.are.braided.or.aren't.color.coded | - See below diagram for pin-outs. |

Legal disclaimer: This information is for general guidance and does not constitute expert advice. We are not responsible if you, your property or a third
party is injured or damaged as a result of any interaction with this information, and no warranty is provided. All text and images are covered by copyright.
6) Where to buy (top)